Android SDK
Outcome: Integrate Paymob's native Android SDK
Manual installation
Step 1: Download SDK files (.jar/.aar)
Download the SDK from this link and unzip the “Sdk package” folder.
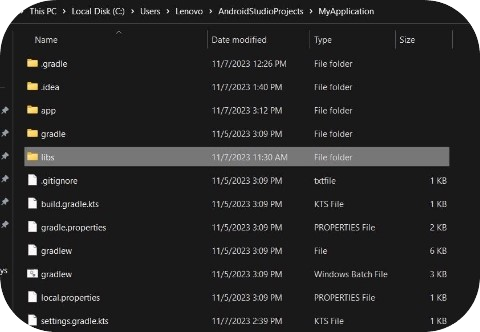
Step 2: Locate the SDK files in app/libs/ folder
Copy the SDK folder into the libs directory of your Android project.

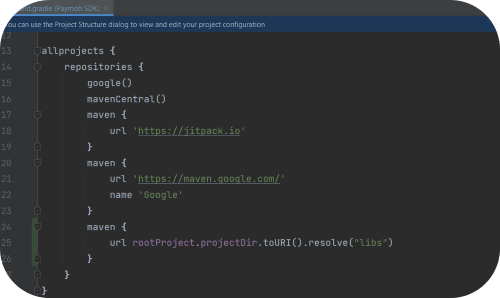
Step 3: Add the repository to settings.gradle.kts
Add required local Repositories as follows:
repositories { maven { url = rootProject.projectDir.toURI().resolve("libs") } maven { url = uri("https://jitpack.io") } }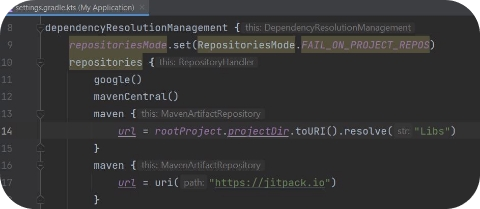
Step 4: Add a dependency in app/build.gradle.kts
implementation("com.paymob.sdk:Paymob-SDK:{{latest version}}")//Please change this version number to match the version number of the downloaded sdk
Step 5: Enable data binding in app/build.gradle.kts
Add your data-binding feature in BaseAppModuleExtensions as follows:
android { buildFeatures { dataBinding = true } }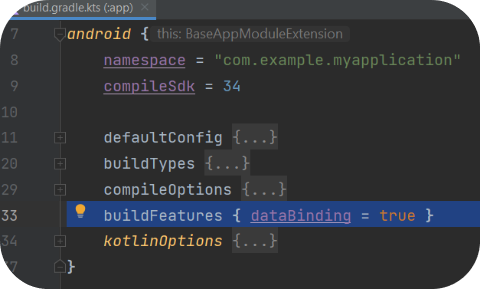
Step 6: Sync gradle project
Usage imports
 import com.paymob.paymob_sdk.PaymobSdk
import com.paymob.paymob_sdk.domain.model.CreditCard
import com.paymob.paymob_sdk.domain.model.SavedCard
import com.paymob.paymob_sdk.ui.PaymobSdkListener
Implement Paymob Sdk listener interface
 class MainActivity : AppCompatActivity(), PaymobSdkListener { override fun onCreate(savedInstanceState: Bundle?) {…}
override fun onSuccess() {
//If the Payment is successful }
override fun onFailure() {
//If The Payment is declined }
override fun onPending() {
//If The Payment is pending }
}Create a PaymobSdk instance
You can create the PaymobSdk instance using PaymobSdk.Builder()
 val paymobsdk = PaymobSdk.Builder(
context = this@MainActivity,
clientSecret = “CLIENT_SECRET”,//Place Client Secret here
publicKey = “PUBLIC_KEY”,//Place Public Key here
paymobSdkListener = this
)
.build()
Client Secret
A unique, intention-specific token used to redirect the customer to Paymob’s Unified Checkout or to render Paymob’s Pixel component.
Public Key
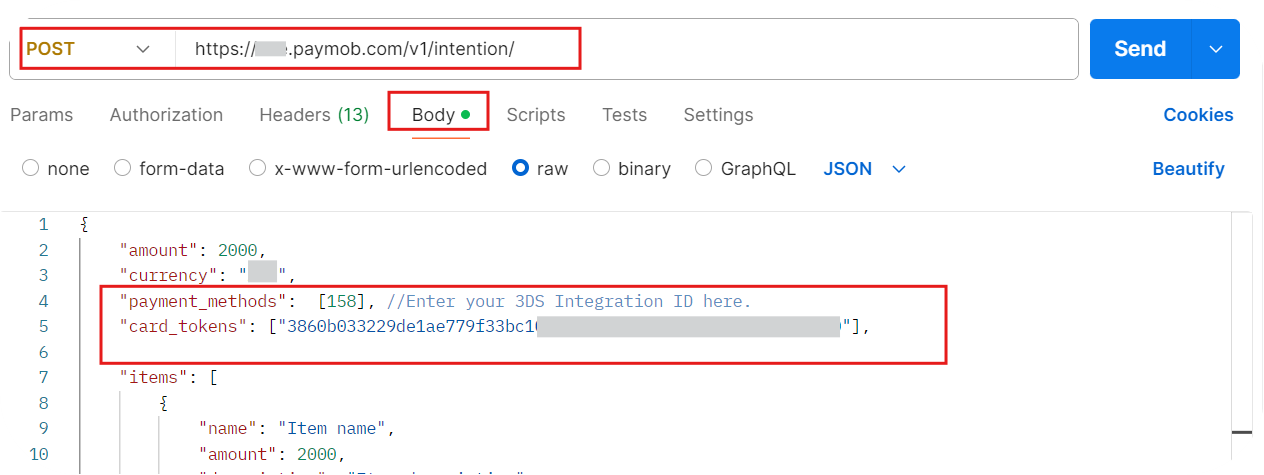
To pass the saved token to the SDK, you should pass the token as a string to the card_tokens array while calling the intention creation request
You can set the SDK buttons' color and buttons' text color using this builder object, for example:
val paymobsdk = PaymobSdk.Builder(context = this@MainActivity,clientSecret = “CLIENT_SECRET”,//Place Client Secret herepublicKey = “PUBLIC_KEY”,//Place Public Key herepaymobSdkListener = this,).setButtonBackgroundColor(Color.BLACK)//changes the color of button backgrounds throughout the SDK, and set by default to black.setButtonTextColor(Color.WHITE)//changes the color of button texts throughout the SDK, and set by default to white.showSaveCard(showSaveCard ?: true) //changes the ability for the sdk to save the card info or no.saveCardByDefault(saveCardDefault ?: false) //changes the ability for the sdk if the save card checkbox is checked ot not.build()Finally: Run the SDK
You can start the SDK by calling
sdk.start()What made this section unhelpful for you?
On this page
- Android SDK