PayMe

Who is this for - Merchants who want a permanent, reusable payment link tied to their business
Outcome - Create your PayMe handle and start collecting payments in minutes
Last Updated Date - August 3, 2026
What Is PayMe?
PayMe is your business's permanent payment identity on Paymob. It gives you one reusable URL that never expires, so customers can pay you at any time, from anywhere, without you creating a new link for each sale.
Important: PayMe is only available in Live Mode. Make sure your account is switched to Live Mode before activating your handle.
Creating Your Handle
1
Go to PayMe
From your Paymob dashboard, go to Payment Links → PayMe.
2
Review Your Handle
A suggested handle will be pre-filled based on your Business Name (or Company Name if no business name is set). Review and edit if desired.
3
Create the Handle
Click Create PayMe Handle to activate it.
4
You're Live
Your link is immediately live and shareable.
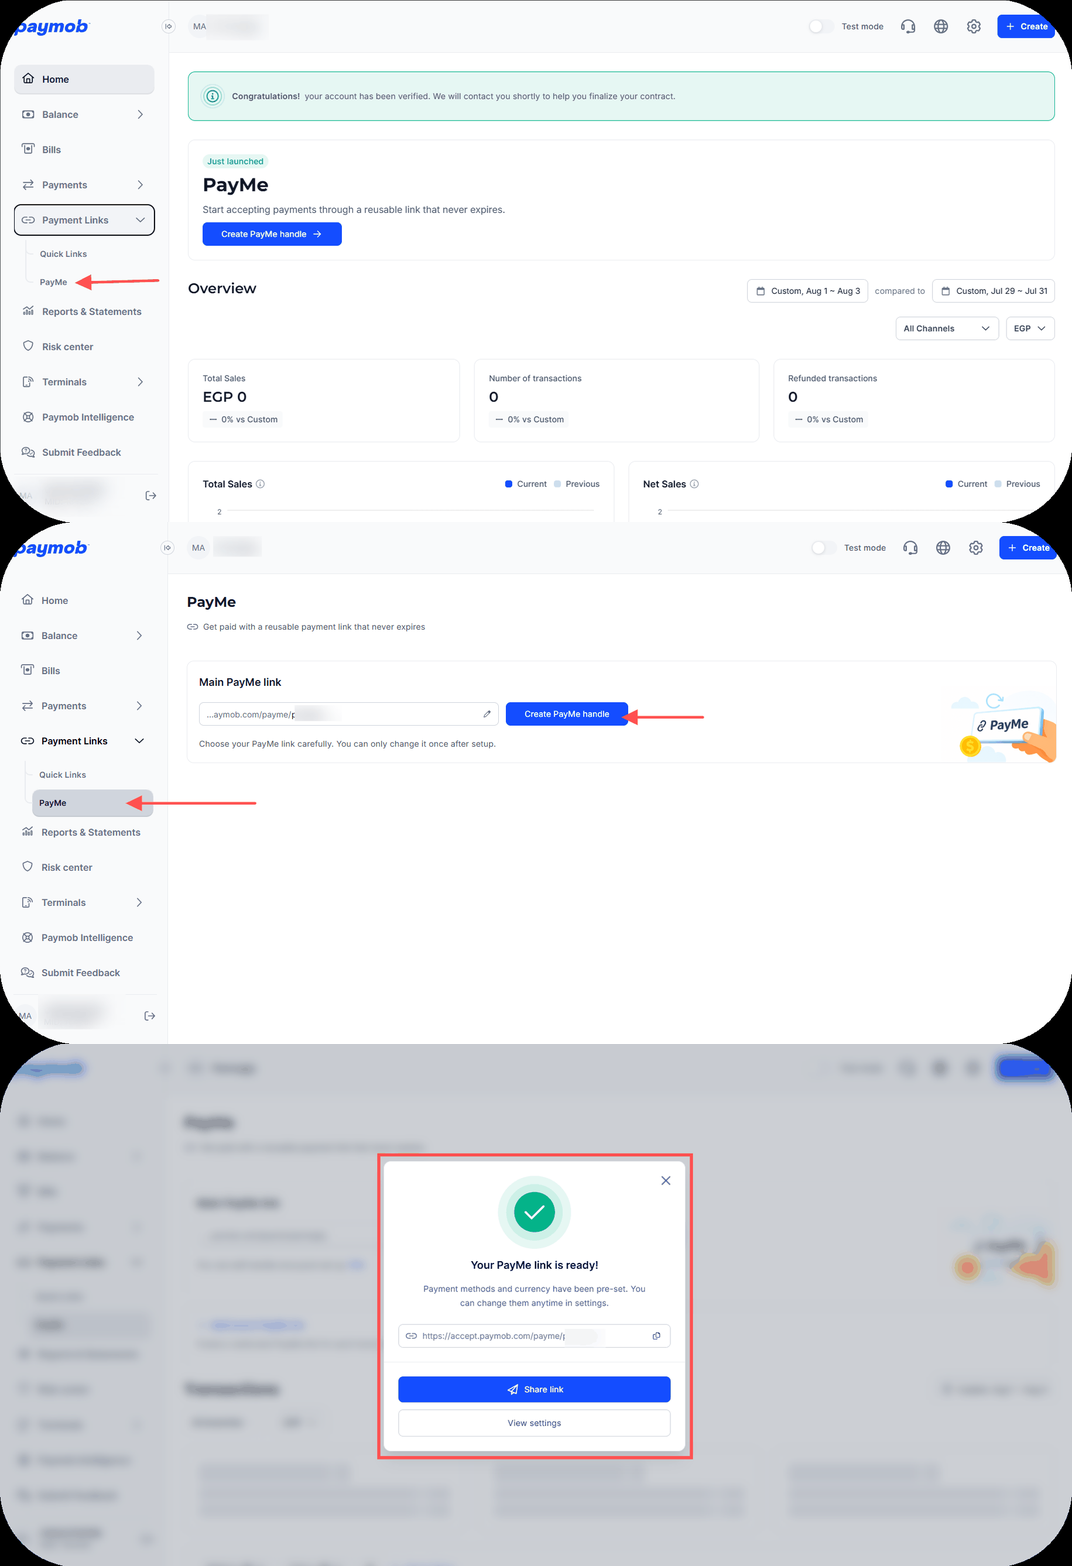
Handle name tip: You can edit your main handle name once after it's activated. Choose carefully — any further name changes require back-office approval and a risk review.
Handle Settings
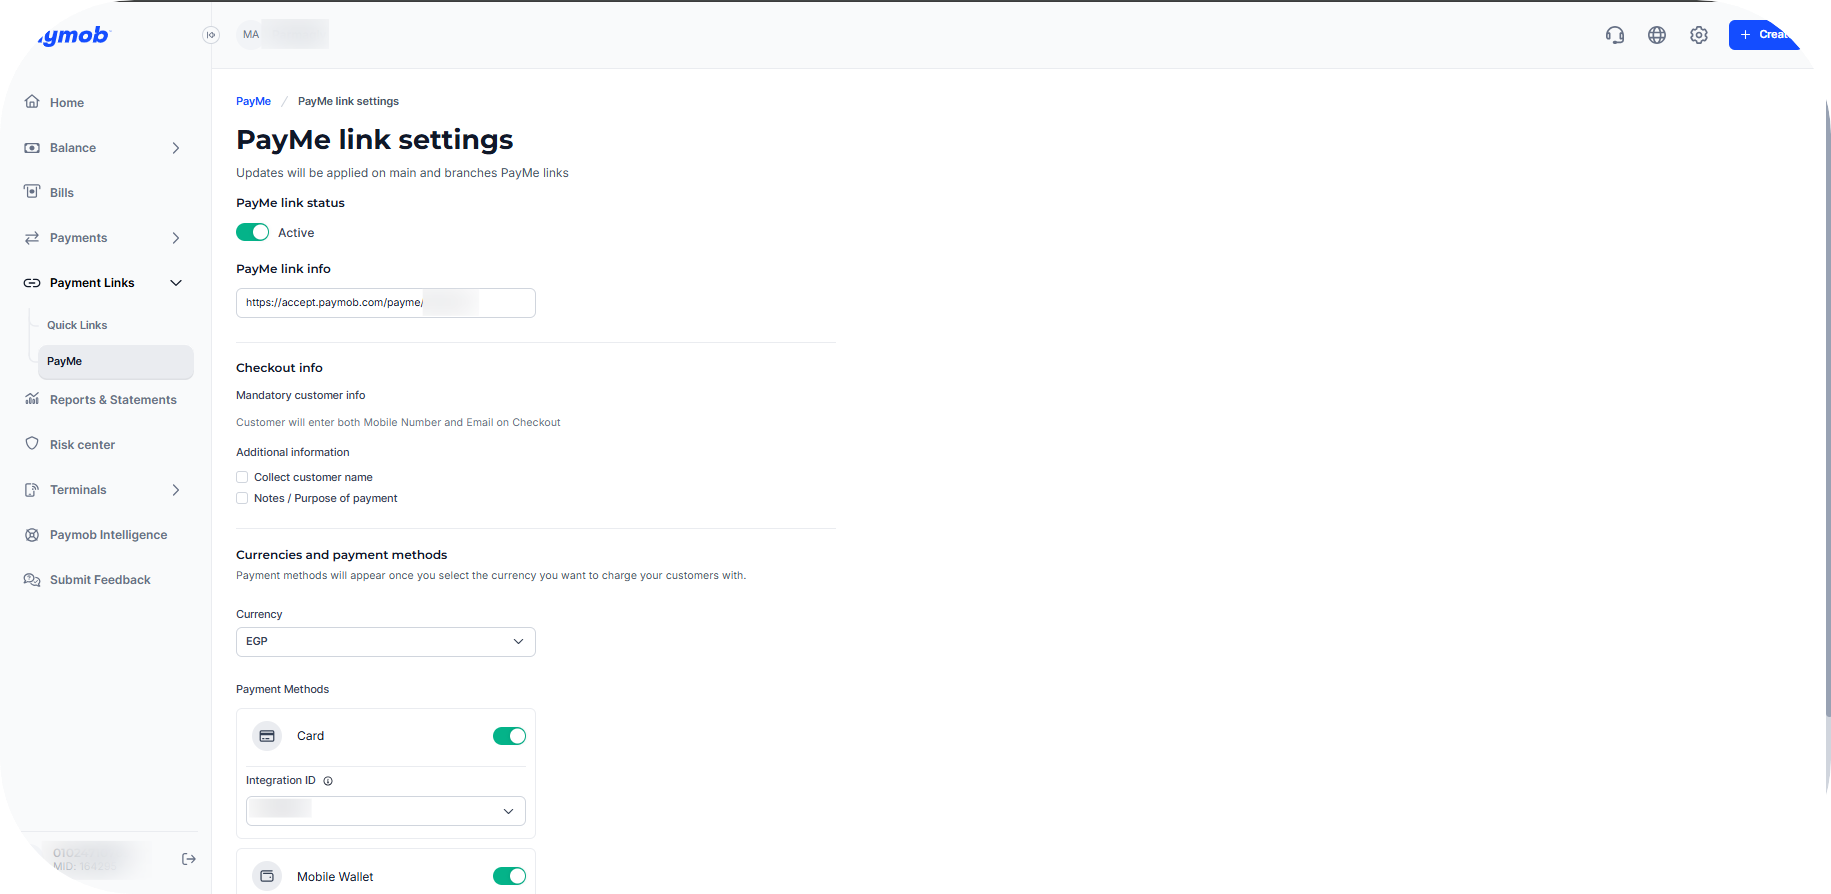
Access your handle settings by clicking Settings on the PayMe page. Settings apply to both the Main Handle and all Branch Handles.
PayMe link status | Toggle to Activate or Deactivate your handle at any time |
Mandatory Billing Data | Choose what to collect from customers: Mobile Number (default), Email, or Both |
Customer Name | Optional — ask customers to enter their name at checkout |
Notes / Purpose of Payment | Optional — let customers add a note describing what the payment is for |
Currency | If multiple currencies are enabled, select which currency your PayMe link will use |
Checkout Customisation | Link to your Checkout Customisation section to update branding, colors, and logo |
Click Save Settings to apply any changes.
Branch Handles
If your business has multiple physical branches, you can create a separate branch handle for each one. Branch handles extend your main handle with a query parameter, e.g.: accept.paymob.com/payme/yourbusiness?branch=Maadi
There's no limit to how many branch handles you can create, and branch names can be updated at any time.
1
Add a Branch
On the PayMe page, click + Add branch PayMe link.
2
Name the Branch
Enter the branch name (up to 50 characters).
3
Create the Branch Link
Click Create branch PayMe link.
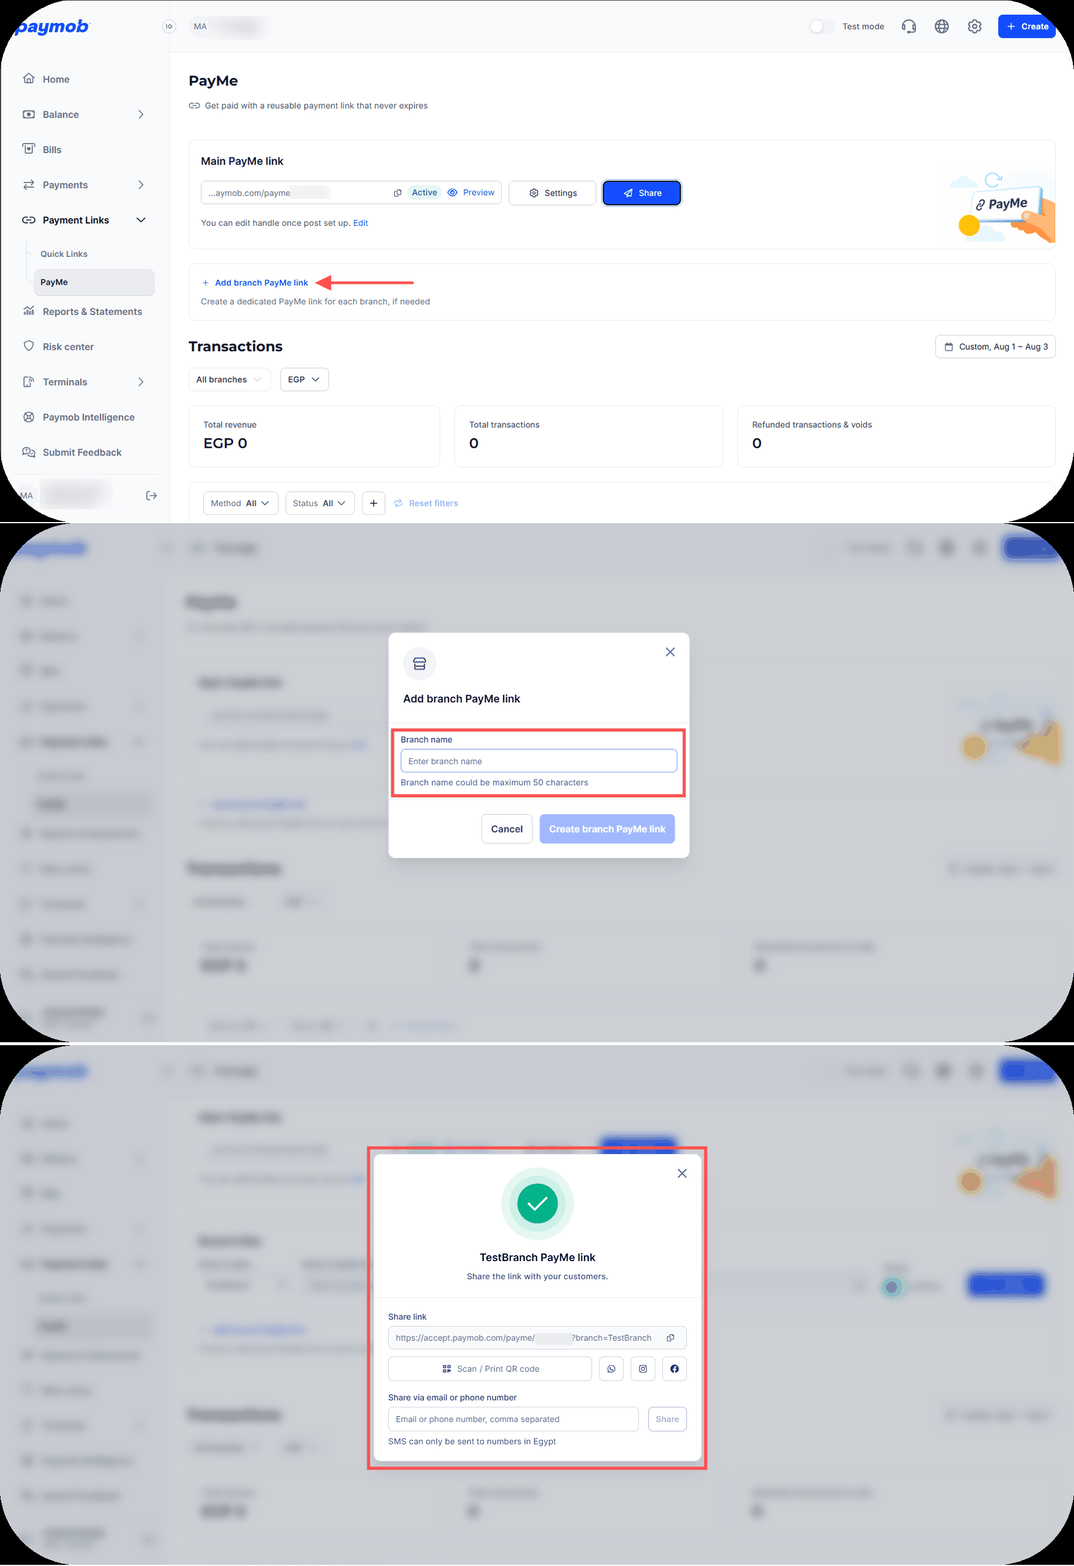
You can then share or toggle (Activate/Deactivate) each branch handle independently.
Note: Deactivating the Main Handle automatically deactivates all branch handles. Reactivating the Main Handle automatically reactivates all branch handles. Deactivating a single branch handle does not affect any other handles.
Sharing Your Handle
Click Share on the PayMe page (or next to any branch handle) to open the sharing options.

Send the link directly to a customer's email address

SMS
Enter a mobile number — SMS can only be sent to numbers in Egypt

Share a pre-filled message with your payment link

Post directly to your business page

Copy the link for your bio or story

QR Code
Generate a branded QR code to print, display at your counter, or use digitally
Transaction Tracking
All payments collected through your PayMe handle appear in the dedicated PayMe tab, filterable by:
- Transaction ID
- Order ID
- Currency
- Payment Method
- Mobile Number
- Email
- Customer Name
- Branch Name
- Date Range
Handle States & Security
Active | The handle is live. Customers can visit the link and pay immediately. |
Inactive | The handle is temporarily disabled by the merchant. |
Security: Every handle is permanently tied to your Merchant ID (MID) and can never be reassigned to another merchant, even if deactivated. Old handle names (after editing) are also permanently reserved; no other merchant can claim them.
If a customer visits a deactivated handle, they'll see: "This payment link is no longer active. Please contact the merchant."


On this page
- PayMe