Odoo

Who is this for: For merchants and developers using Odoo who want to enable Paymob payments on their store.
Outcome: Explore, Install, and Configure Paymob's powerful Odoo modules
Overview
Paymob offers multiple Odoo integrations to support different Odoo versions and deployment models. Odoo 18, 17, 16, and 15
Built and maintained by Paymob, these modules are available for merchants using Odoo.sh and Odoo On-Premise.
Odoo Version 18
The Odoo Payment Plugin is available for merchants using Odoo.sh and Odoo On-Premise.
Installation & Configuration Steps
1
Merchants can access the plugin via Paymob | Odoo Apps Store.
2
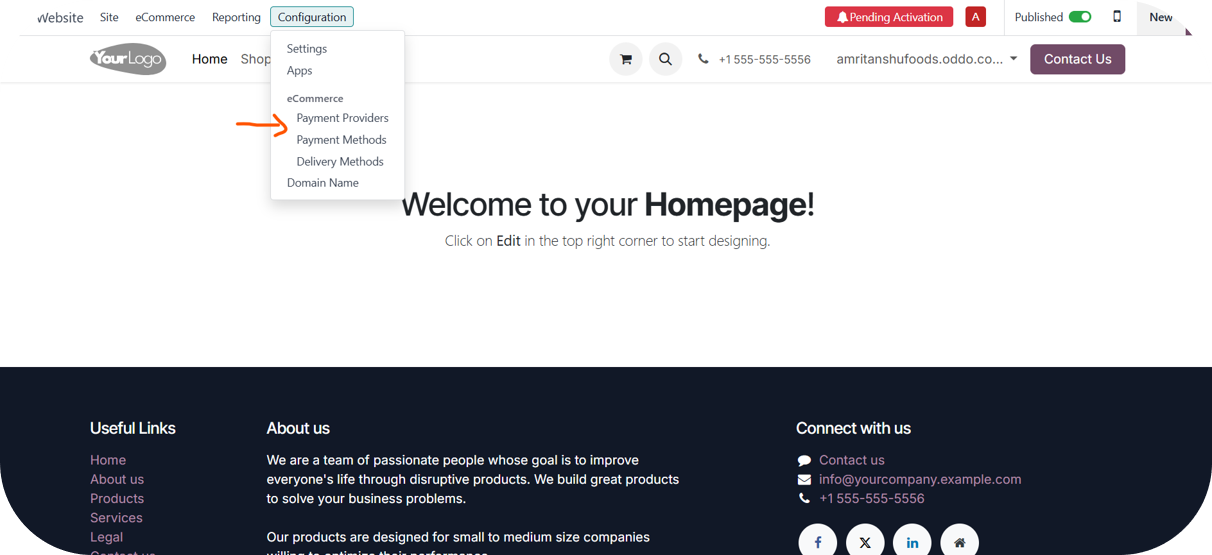
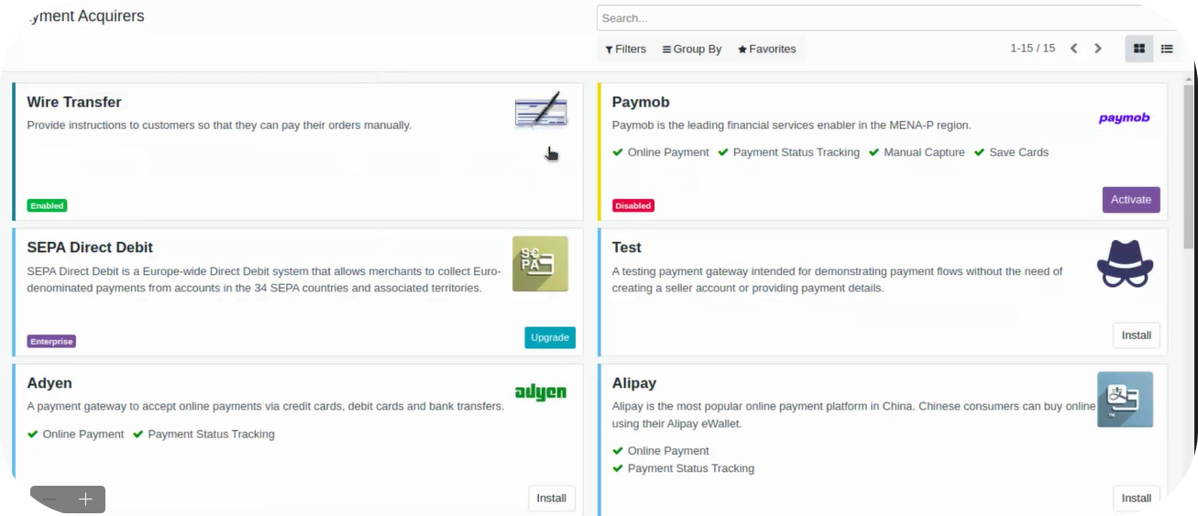
Once you deploy the plugin on the Odoo Instance, navigate to Configuration ⇒ Payment Providers.
3
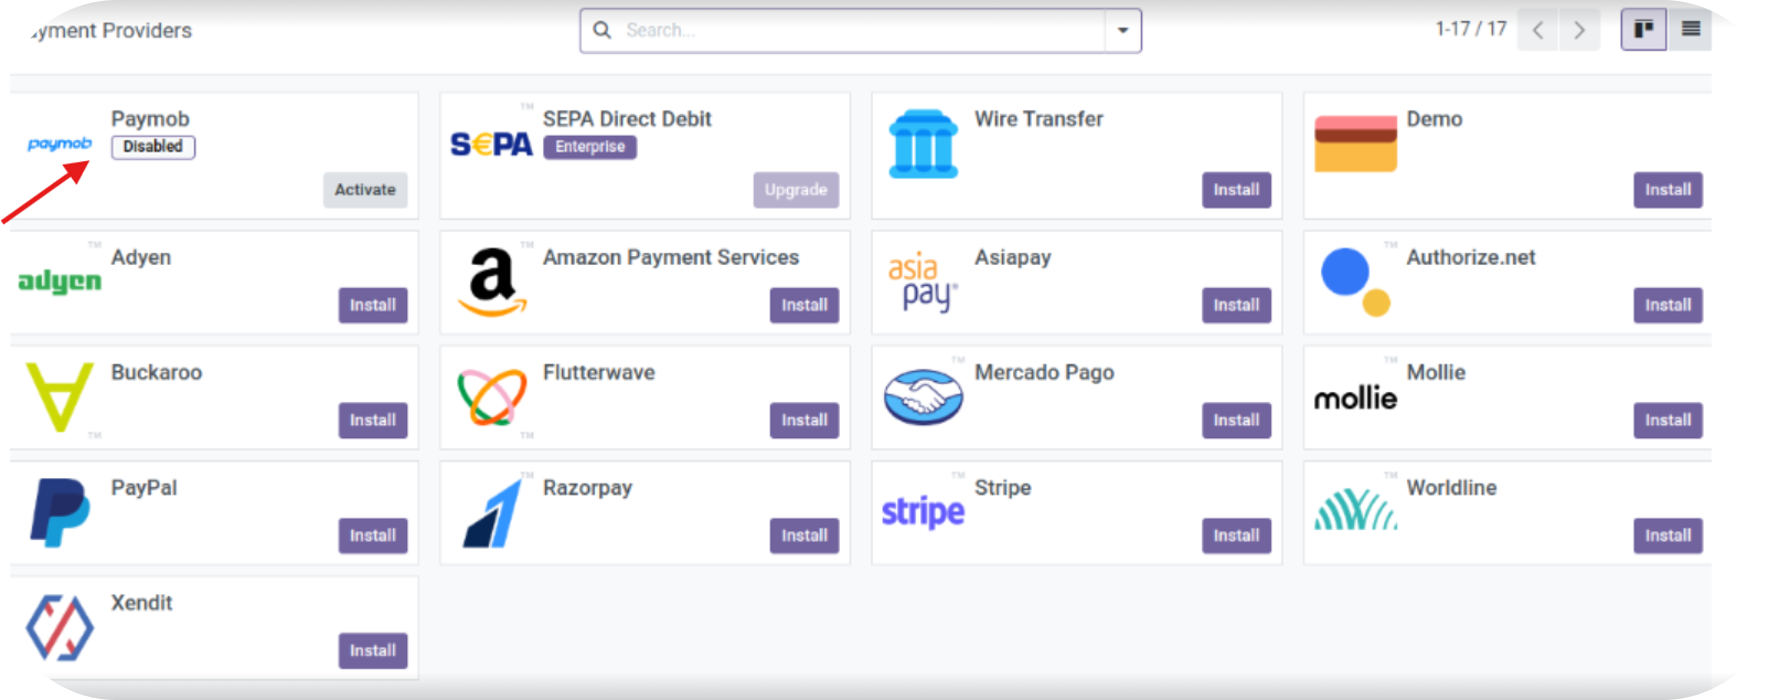
Activate the Paymob Plugin.
4
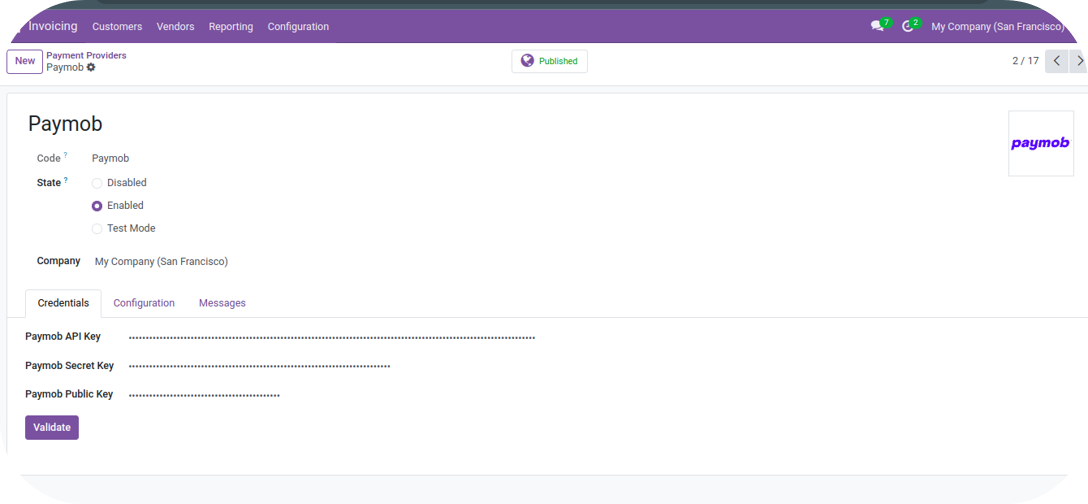
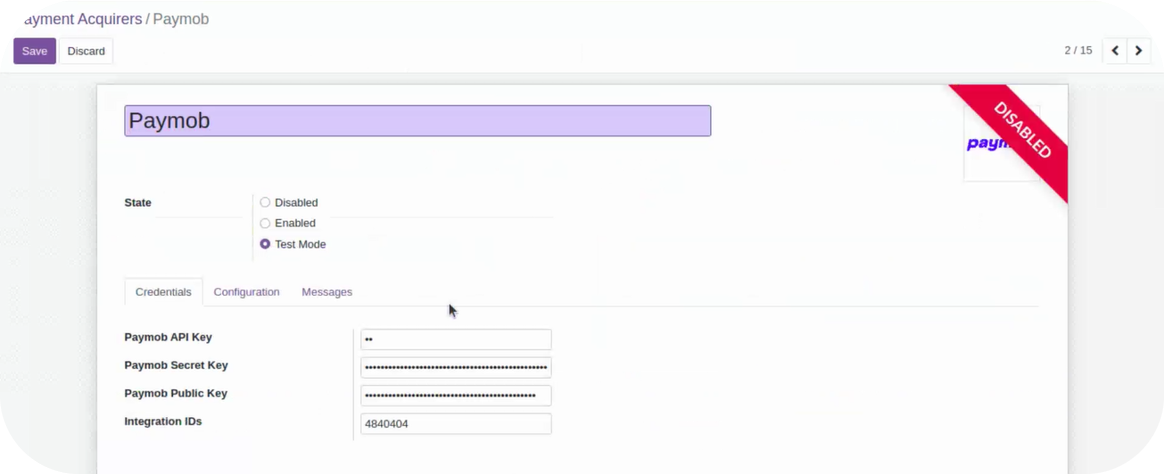
After activation is complete, you will be directed to the screen below:
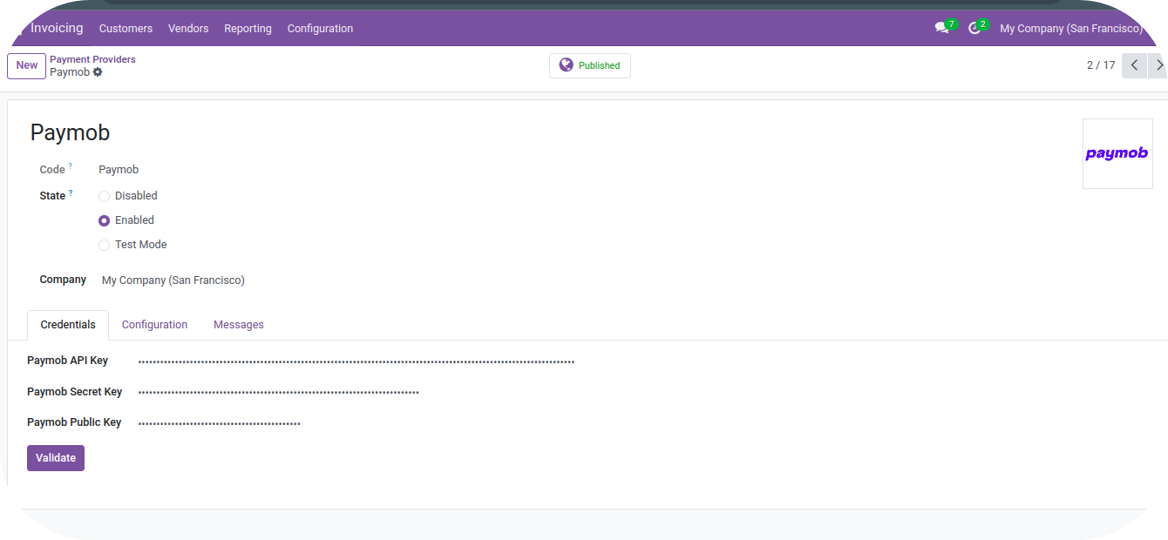
5
Credential Section
- If the "Enabled" state is selected, the plugin will be in the Published state. Enter the Live Mode API Key, Secret Key, and Public Key.
- If the "Test Mode" state is selected, the plugin will be in the Unpublished state. Enter the Test Mode API Key, Secret Key, and Public Key.
- If you select LIVE Mode, all transactions will involve real money.
6
After entering the keys, click on “Validate”. If the keys are validated successfully, all the Payment Methods will be enabled for the given set of keys.
7
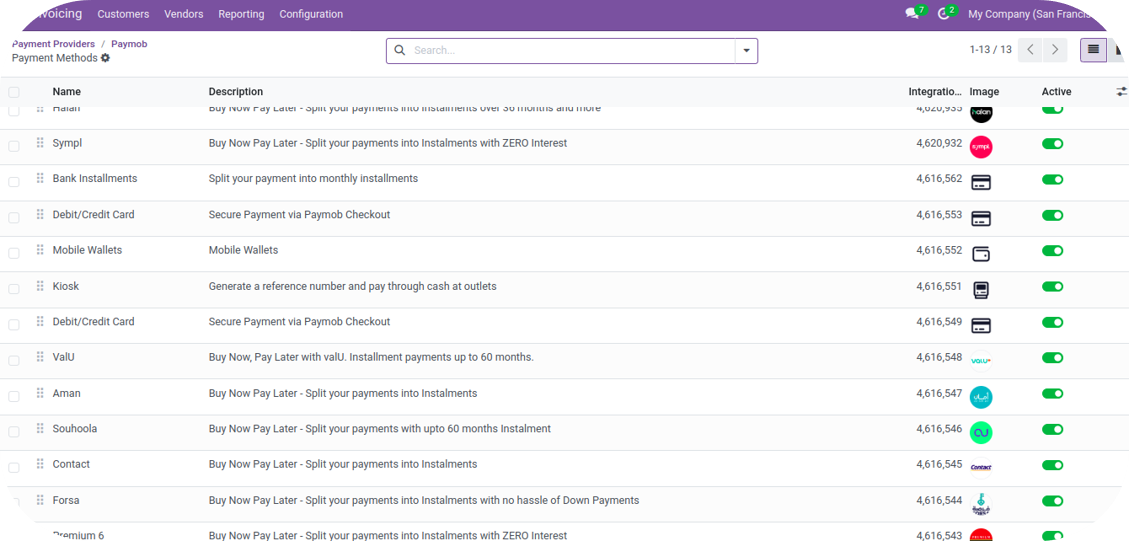
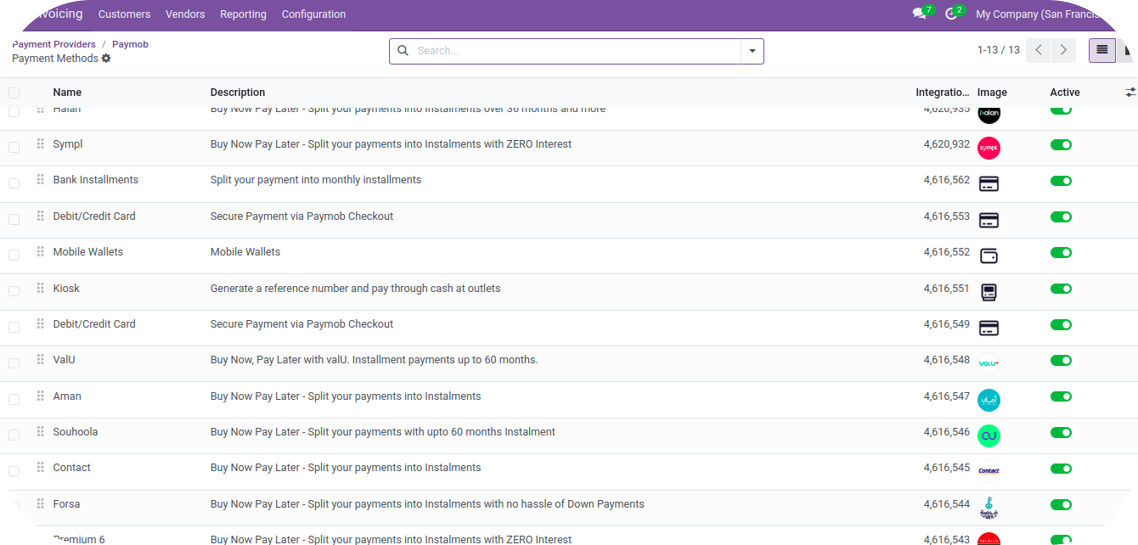
Merchants can view the available payment methods on the Configuration Page.

8
The merchant can click on “Enable Payment Methods” to view all the Payment Integrations for the entered Keys. By default, the Payment Methods will be in a disabled state. Merchants will need to enable the Payment Methods. Merchants can edit the logo of Payment Methods and change the name of Payment Method by clicking on the respective Payment Methods. It’s recommended not to edit the name and logo of Payment Methods. In Odoo 18, payment methods will be displayed as a list. Payments that are in an Active State will be shown on Odoo's Checkout
9
Webhook Configurations - Once the merchant enables any Payment Method, the webhook will be automatically configured in the Paymob System for that integration ID.
10
Card Tokenization In case the merchant wants to enable the “Pay with Saved Card” feature for the consumer, the following steps need to be followed:
If the user consents to save the card during the initial transaction, the user will be shown the option to pay with saved cards for subsequent transactions.
FAQ’s
- The plugin is available in Egypt, UAE, KSA, and Oman.
- The plugin supports the Auth + Capture Model.
- The plugin supports both Full and Partial Refunds.
- The plugin supports Checkout Customization.
Odoo Version 17
The Odoo Payment Plugin is available for merchants using Odoo.sh and Odoo On-Premise.
Installation & Configuration Steps
1
Merchants can access the plugin via Paymob | Odoo Apps Store.
2
Once you deploy the plugin on the Odoo Instance, navigate to Configuration → Payment Providers.
3
Activate the Paymob Plugin.
4
After activation is complete, you will be directed to the screen below:
5
Credential Section
- If the "Enabled" state is selected, the plugin will be in the Published state. Enter the Live Mode API Key, Secret Key, and Public Key.
- If the "Test Mode" state is selected, the plugin will be in the Unpublished state. Enter the Test Mode API Key, Secret Key, and Public Key.
- If you select LIVE Mode, all transactions will involve real money.
6
After entering the keys, click on “Validate”. If the keys are validated successfully, all the Payment Methods will be enabled for the given set of keys.
7
Merchants can view the available payment methods on the Configuration Page.
8
The merchant can click on “Enable Payment Methods” to view all the Payment Integrations for the entered Keys. By default, the Payment Methods will be in a disabled state. Merchants will need to enable the Payment Methods. Merchants can edit the logo of Payment Methods and change the name of Payment Method by clicking on the respective Payment Methods. It’s recommended not to edit the name and logo of Payment Methods. In Odoo 17, payment methods will be displayed as a list. Payments that are in an Active State will be shown on Odoo's Checkout
9
Webhook Configurations - Once the merchant enables any Payment Method, the webhook will be automatically configured in the Paymob System for that integration ID.
10
Card Tokenization In case the merchant wants to enable the “Pay with Saved Card” feature for the consumer, the following steps need to be followed:
If the user consents to save the card during the initial transaction, the user will be shown the option to pay with saved cards for subsequent transactions.
FAQ’s
- The plugin is available in Egypt, UAE, KSA, and Oman.
- The plugin supports the Auth + Capture Model.
- The plugin supports both Full and Partial Refunds.
- The plugin supports Checkout Customization.
Odoo Version 16
The Odoo Payment Plugin is available for merchants using Odoo.sh and Odoo On-Premise.
Installation & Configuration Steps
1
Merchants can access the plugin via Paymob | Odoo Apps Store.
2
Once you deploy the plugin on the Odoo Instance, navigate to Configuration ⇒ Payment Providers.

3
Activate the Paymob Plugin.

4
After activation is complete, you will be directed to the screen below:
5
Credential Section
If the state "Enabled" is selected, the plugin will be in the Published state. Enter the Live Mode API Key, Secret Key, Public Key & the LIVE Payment Integration IDs are to be made available on Paymob’s Checkout.
If the state "Test Mode" is selected, the plugin will be in the Unpublished state. Enter the Test Mode API Key, Secret Key, Public Key & the TEST Payment Integration ID are to be made available on Paymob’s Checkout for testing Purposes.
Note: The keys for Test and Live Mode are different..
6
After entering the keys & the integration id’s, click on "Validate." If the keys are successfully validated, all the payment methods associated with the entered integration IDs will be enabled.
7
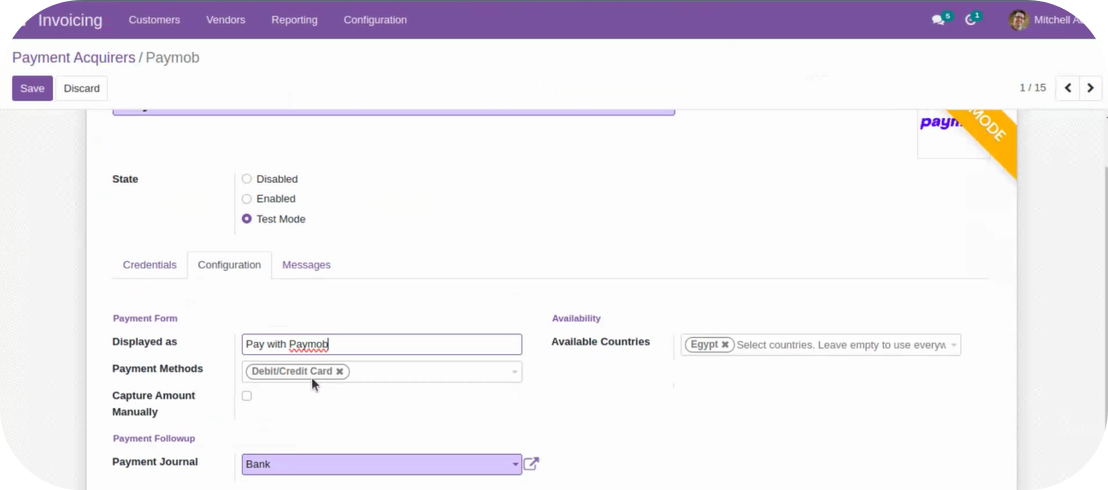
Merchants can view the available payment methods on the Configuration Page under the Payment Form section.
In Odoo 16, payment methods will not be displayed as a list. Instead, only the provider name or the The name set by the merchant in the "Displayed as" label will appear on Odoo's checkout.
8
Webhook Configurations - Once merchants enter the Integration IDs in the Credentials section and the keys are validated, the webhook will be automatically configured in the Paymob system for those integration IDs.
09
Card Tokenization In case the merchant wants to enable the “Pay with Saved Card” feature for the consumer, the following steps need to be followed:
If the user consents to save the card during the initial transaction, the user will be shown the option to pay with saved cards for subsequent transactions.
FAQ’s
- The plugin is available in Egypt, UAE, KSA, and Oman.
- The plugin supports the Auth + Capture Model.
- The plugin supports both Full and Partial Refunds.
- The plugin supports Checkout Customization.
Odoo Version 15
The Odoo Payment Plugin is available for merchants using Odoo.sh and Odoo On-Premise.
Installation & Configuration Steps
1
Merchants can access the plugin via Paymob | Odoo Apps Store.
2
Once you deploy the plugin on the Odoo Instance, navigate to Configuration ⇒ Payment Acquirers.
3
Activate the Paymob Plugin.
4
After activation is complete, you will be directed to the screen below:
5
Credential Section
If the state "Enabled" is selected, the plugin will be in the Published state. Enter the API Key, Secret Key, Public Key & the LIVE Payment Integration IDs are to be made available on Paymob’s Checkout.
If the state "Test Mode" is selected, the plugin will be in the Unpublished state. Enter the API Key, Secret Key, Public Key & the TEST Payment Integration ID are to be made available on Paymob’s Checkout for testing Purposes.
6
After entering the keys & the integration id’s, click on "Validate." If the keys are successfully validated, all the payment methods associated with the entered integration IDs will be enabled.
7
Merchants can view the available payment methods on the Configuration Page under the Payment Form section.
In Odoo 15, payment methods will not be displayed as a list. Instead, only the provider name, or the name set by the merchant in the "Displayed as" label will appear on Odoo's checkout.
8
Webhook Configurations - Once merchants enter the Integration IDs in the Credentials section and the keys are validated, the webhook will be automatically configured in the Paymob system for those integration IDs.
09
Card Tokenization In case the merchant wants to enable the “Pay with Saved Card” feature for the consumer, the following steps need to be followed:
If the user consents to save the card during the initial transaction, the user will be shown the option to pay with saved cards for subsequent transactions.
FAQ’s
- The plugin is available in Egypt, UAE, KSA, and Oman.
- The plugin supports the Auth + Capture Model.
- The plugin supports both Full and Partial Refunds.
- The plugin supports Checkout Customization.
Odoo enterprise
It's the standard version of Odoo and allows its users to utilize all its modules with limited customization. Currently, Paymob is available as a payment provider on its invoicing, sales, website, and e-commerce apps, providing merchants with a streamlined onboarding process and an embedded payment experience.
How to Accept Payments using Paymob on Odoo?
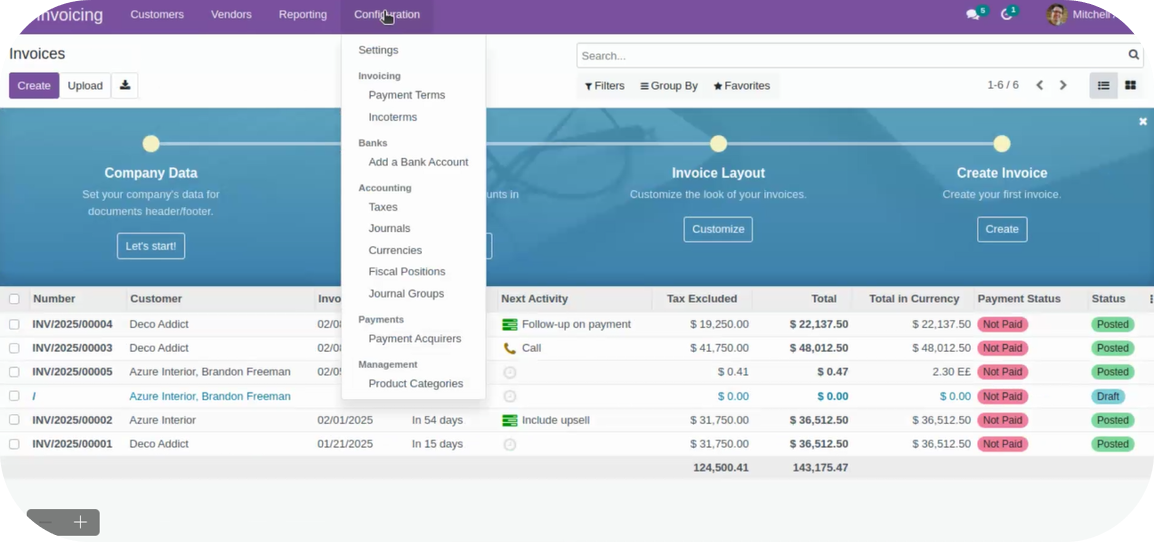
1
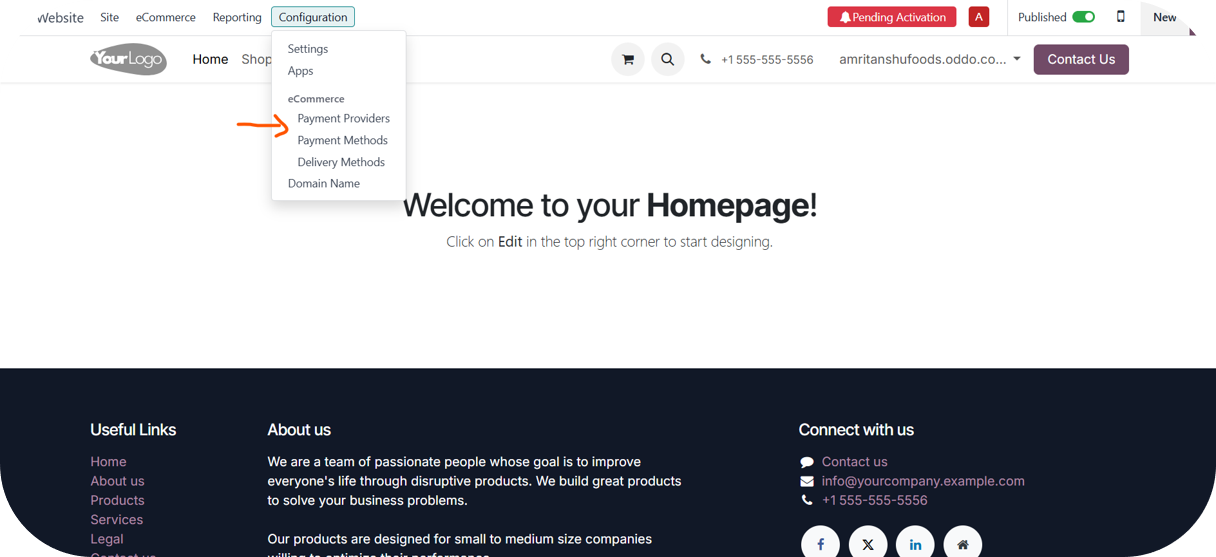
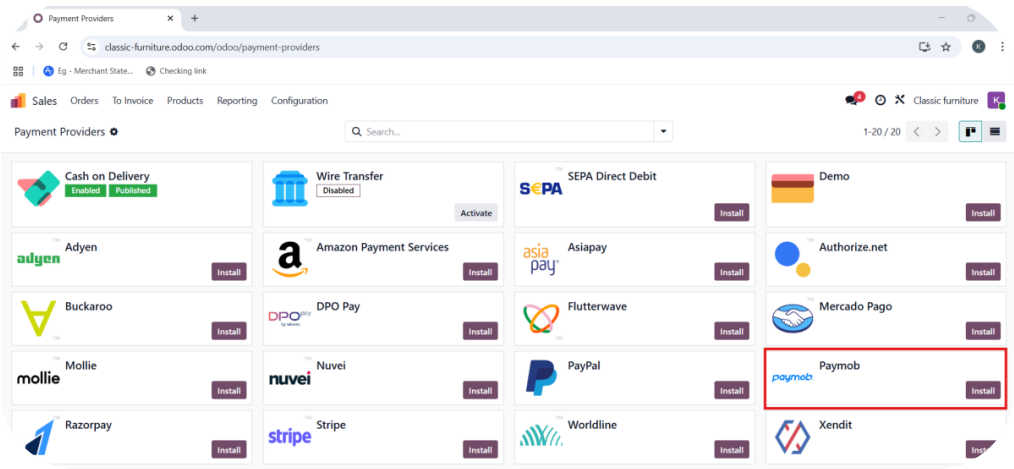
Navigate to Configuration ⇒ Payment Providers.
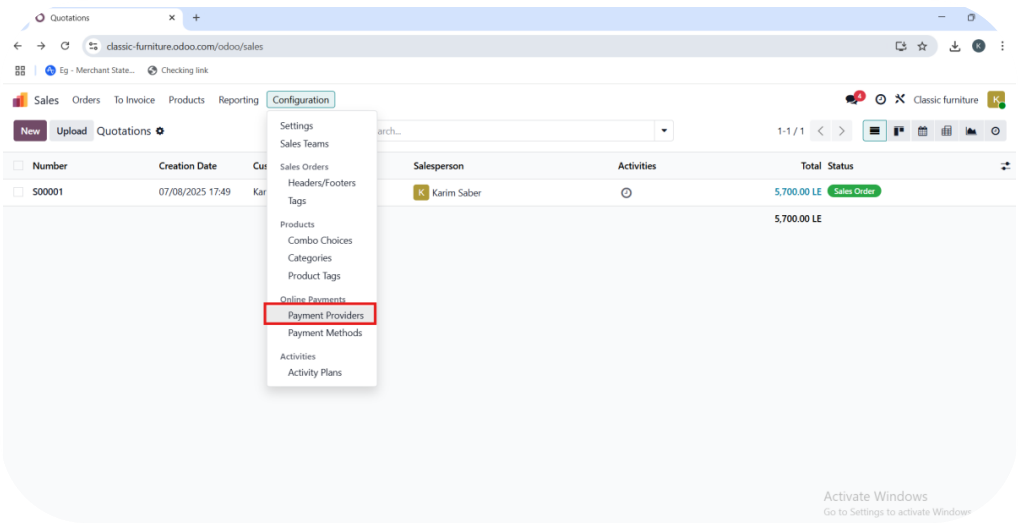
2
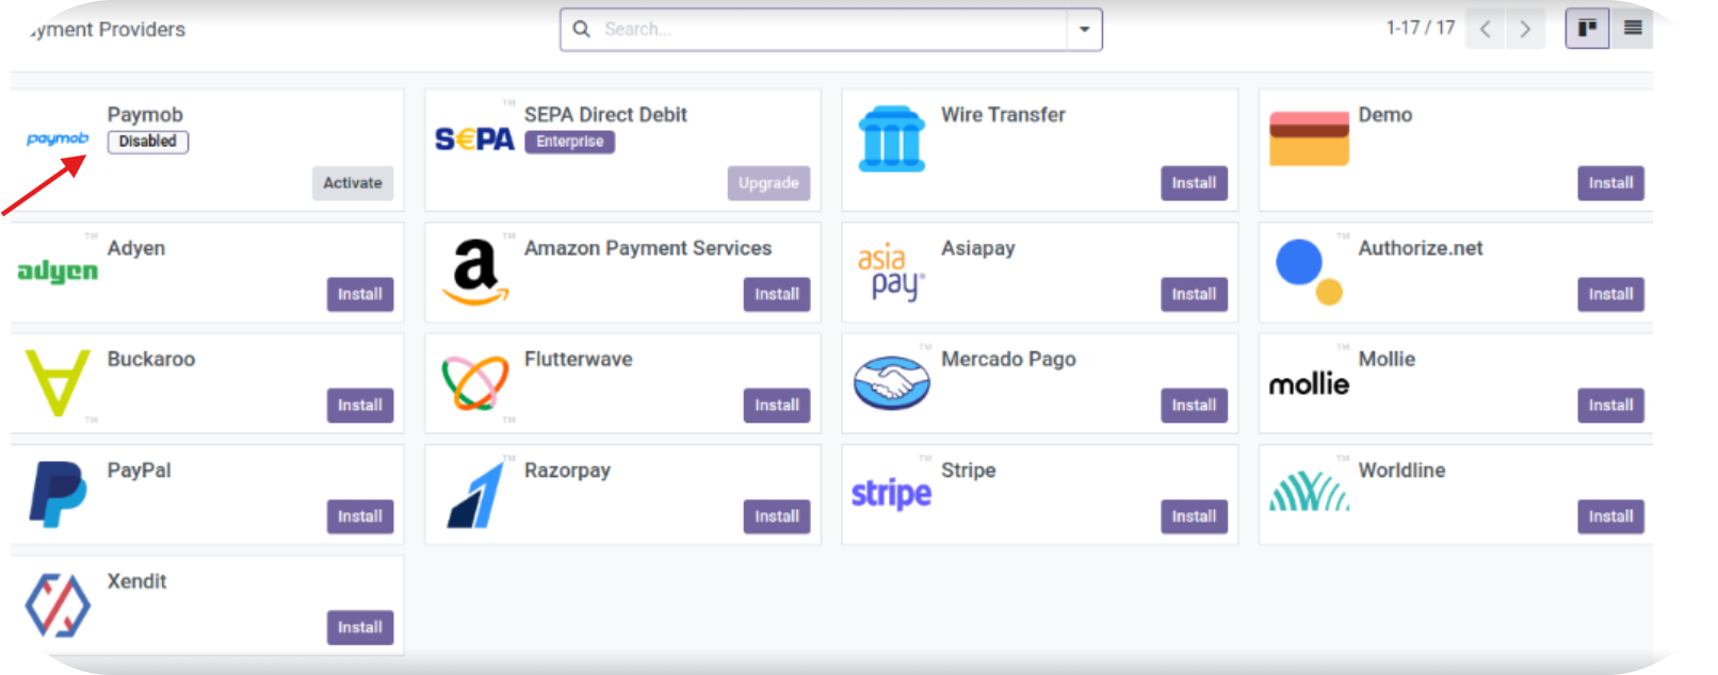
Find Paymob in the list of available providers.
3
Click Install to add Paymob as a payment option.
4
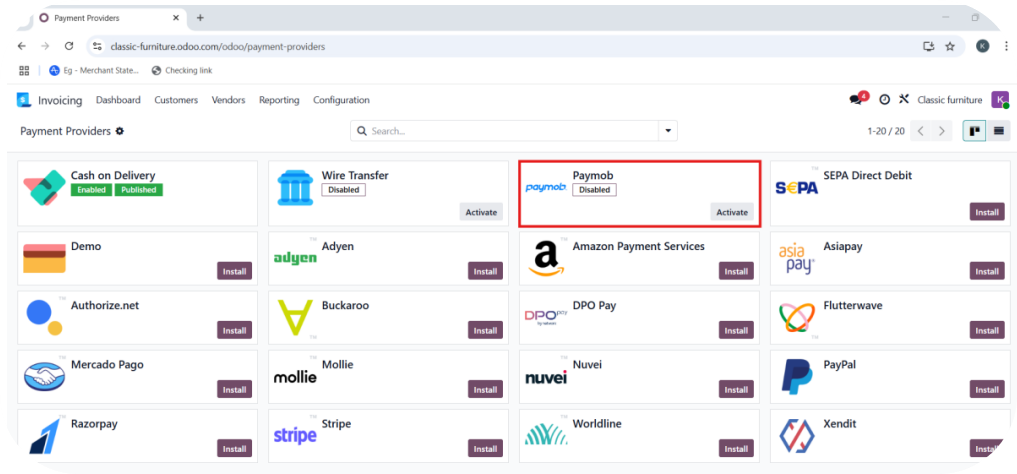
After installation, click Activate to begin configuration.
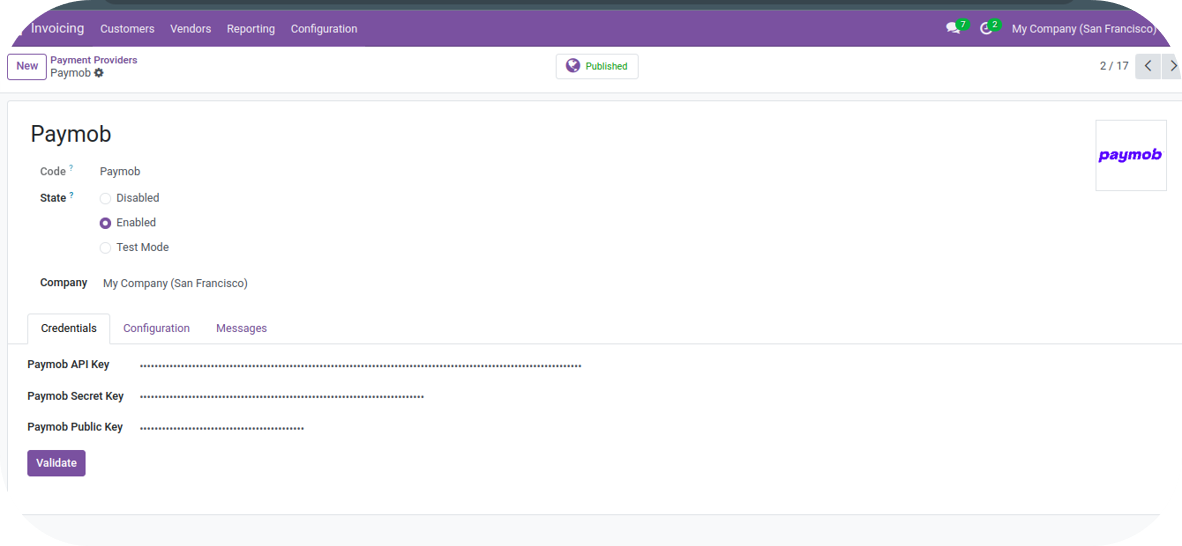
5
You will be directed to the Paymob configuration screen.
6
Set up Paymob credentials in the Credential Section
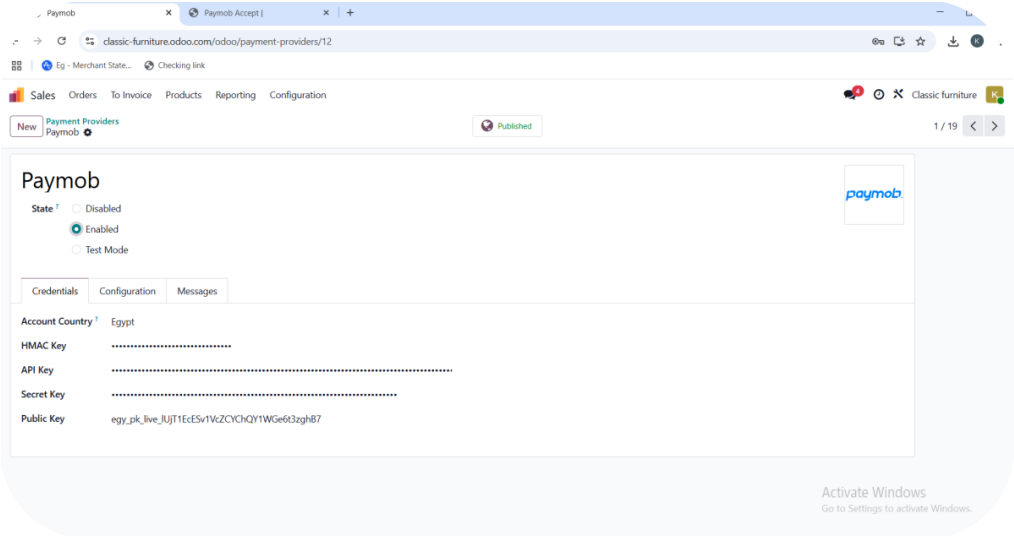
Configuration Based on Mode:
• If “Enabled” is selected, the plugin will be in the Published state.
→ Enter your Live HMAC, API Key, Secret Key, and Public Key.
• If “Test Mode” is selected, the plugin will be in the Unpublished state.
→ Enter your Test HMAC, API Key, Secret Key, and Public Key.
- Select the Account Country (e.g., Egypt).
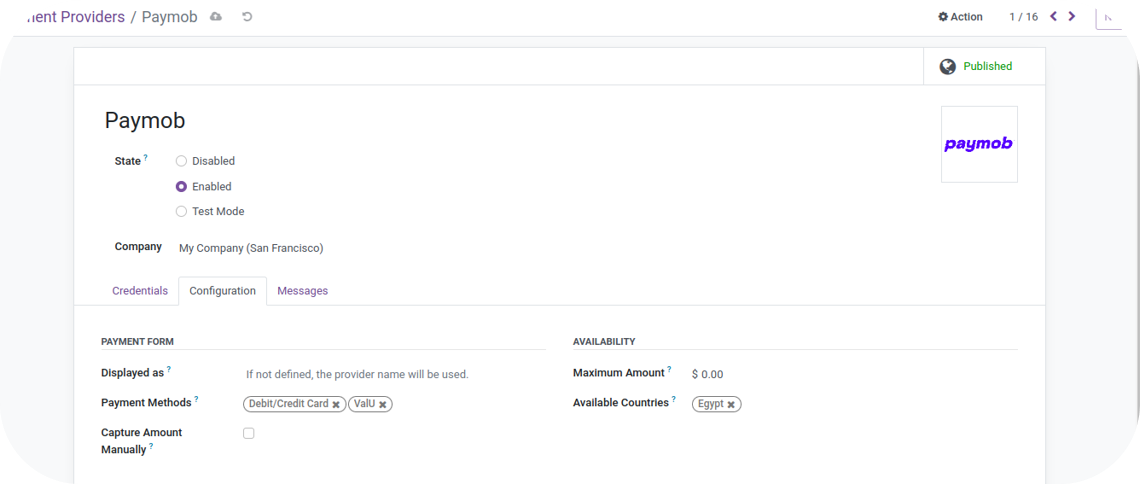
7
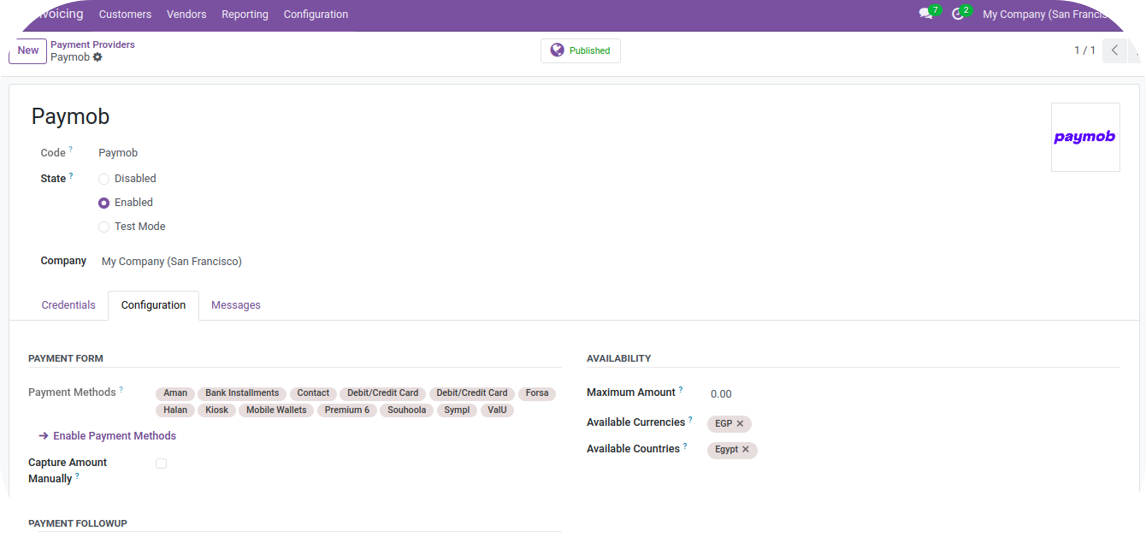
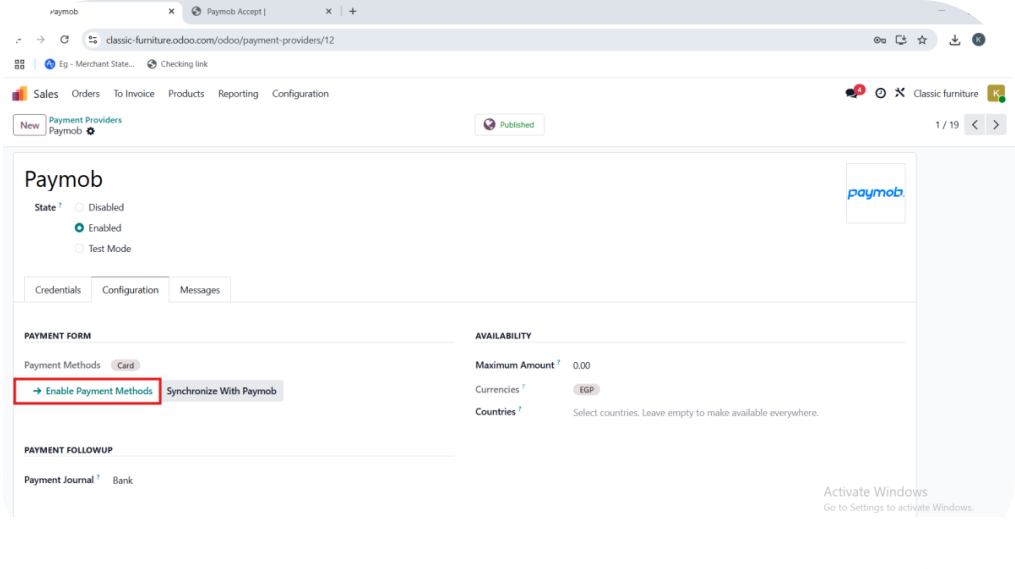
Navigate to the Configuration Section
8
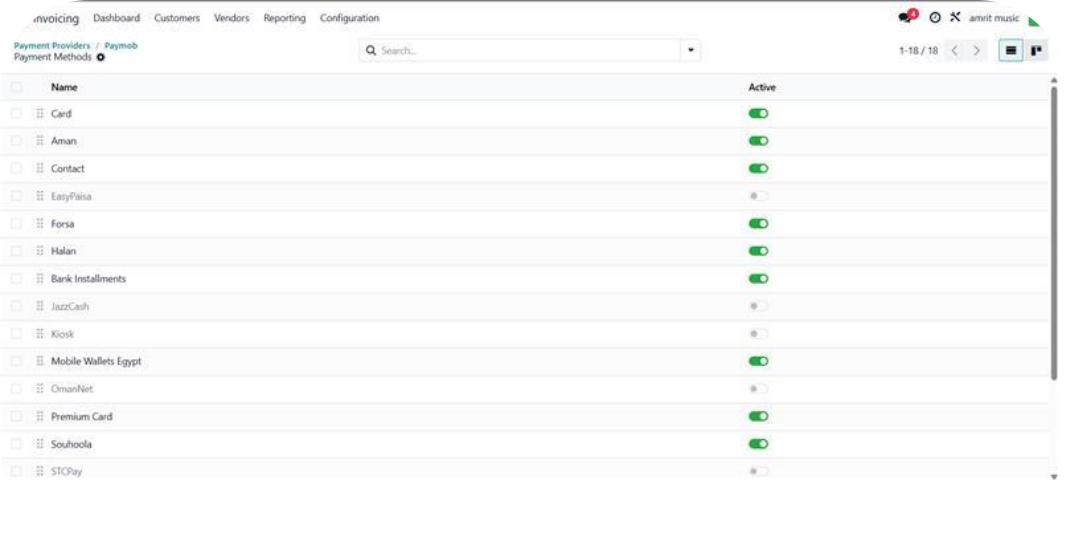
Click Enable Payment Methods.
9
Select the payment methods you'd like to activate on Odoo's checkout
10
After selecting your payment methods:
• Click the “Synchronize with Paymob” button.
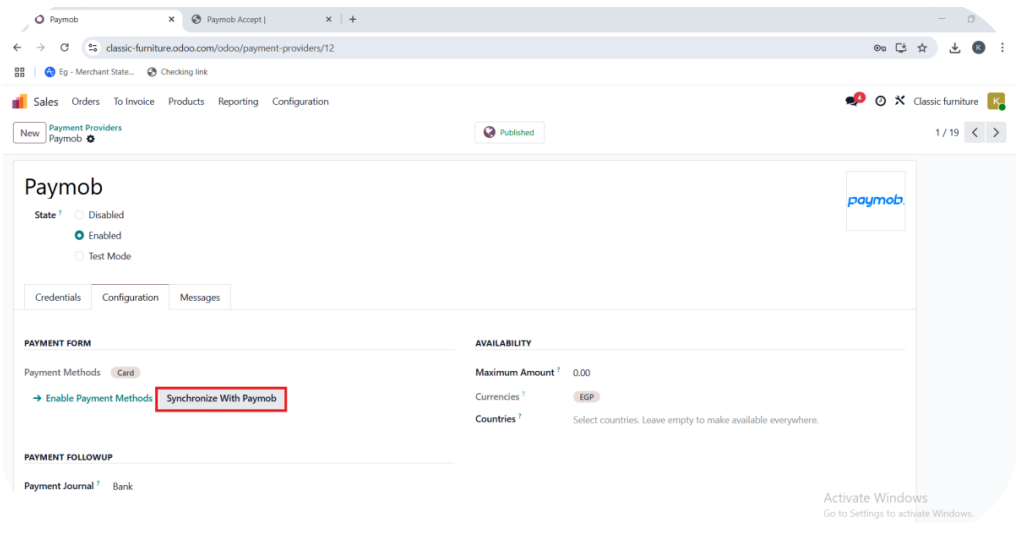
• This confirms your configuration and finalizes the setup.
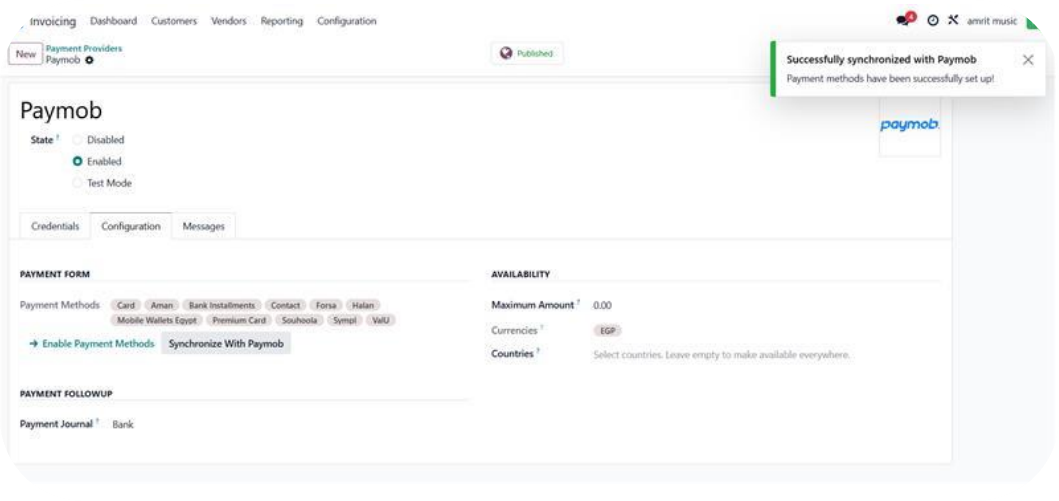
Once synchronization is successful:
• Your Paymob integration is complete.
• You can now accept payments directly on your Odoo store. Feel free to contact support@paymob.com if you have any issues or inquiries. We will be glad to help you.
What made this section unhelpful for you?
On this page
- Odoo