PrestaShop

Who is this for - For PrestaShop merchants and technical admins who want to enable Paymob payments on their store without building a custom integration
Outcome - Explore, Install, and Configure Paymob's PrestaShop plugin
Overview
The Paymob PrestaShop plugin allows merchants to accept online payments directly on their PrestaShop store through a ready-to-use integration. It supports multiple payment methods and handles the full checkout flow securely, enabling a smooth payment experience without requiring custom development.
Supported versions: 1.6, 1.7, and 8
Installation Steps
1
Download the Paymob PrestaShop module from this link.
2
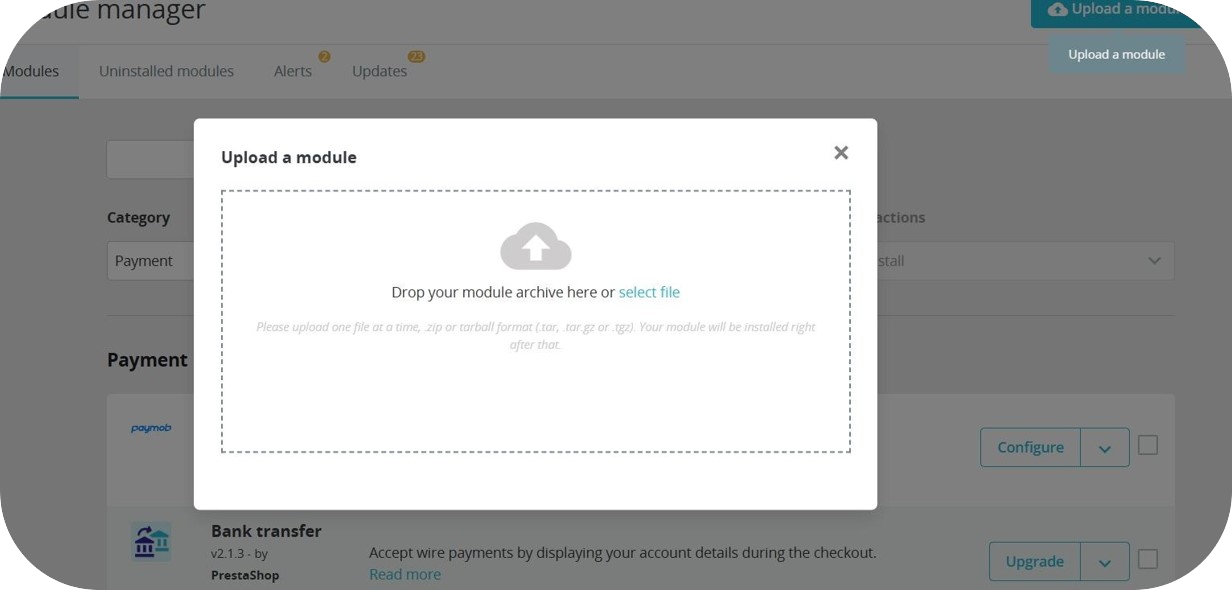
Login into Prestashop admin panel ⇒ Modules ⇒ Module Manager ⇒ Upload a module.
3
Select the Paymob downloaded .zip file.
4
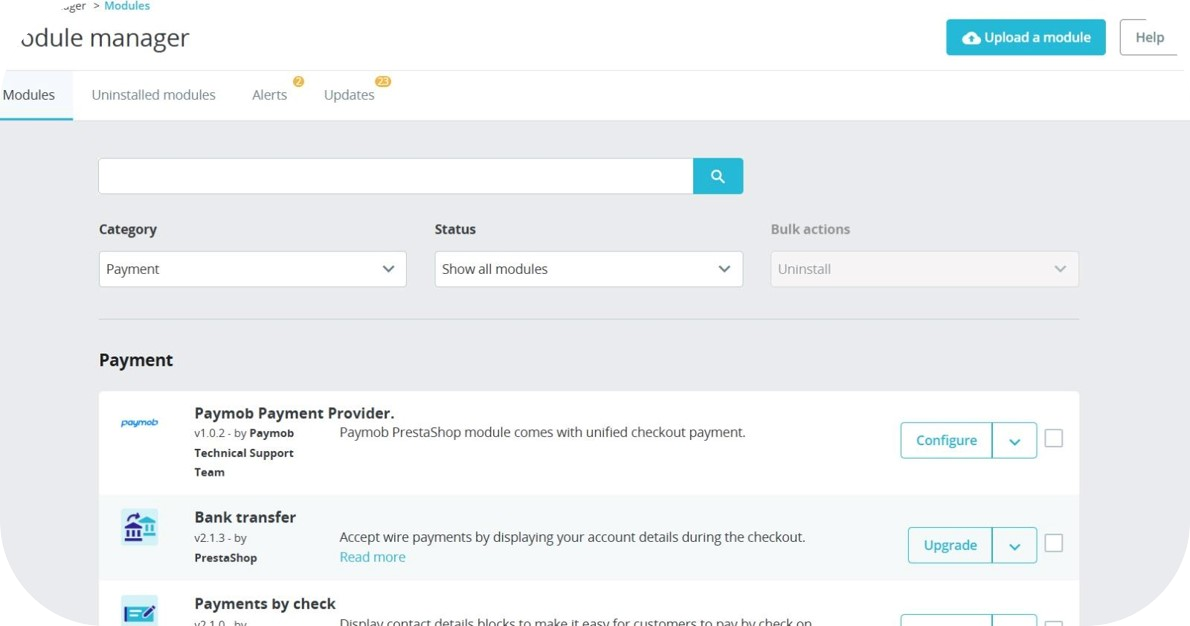
You will see that the module is now uploaded and installed, and the Paymob module will appear on the module list.
Plugin Configuration
1
From the Prestashop admin panel, in the left menu, Payments ⇒ payment methods.
2
Click on the Configure button beside the Paymob payment method to start the configuration.
3
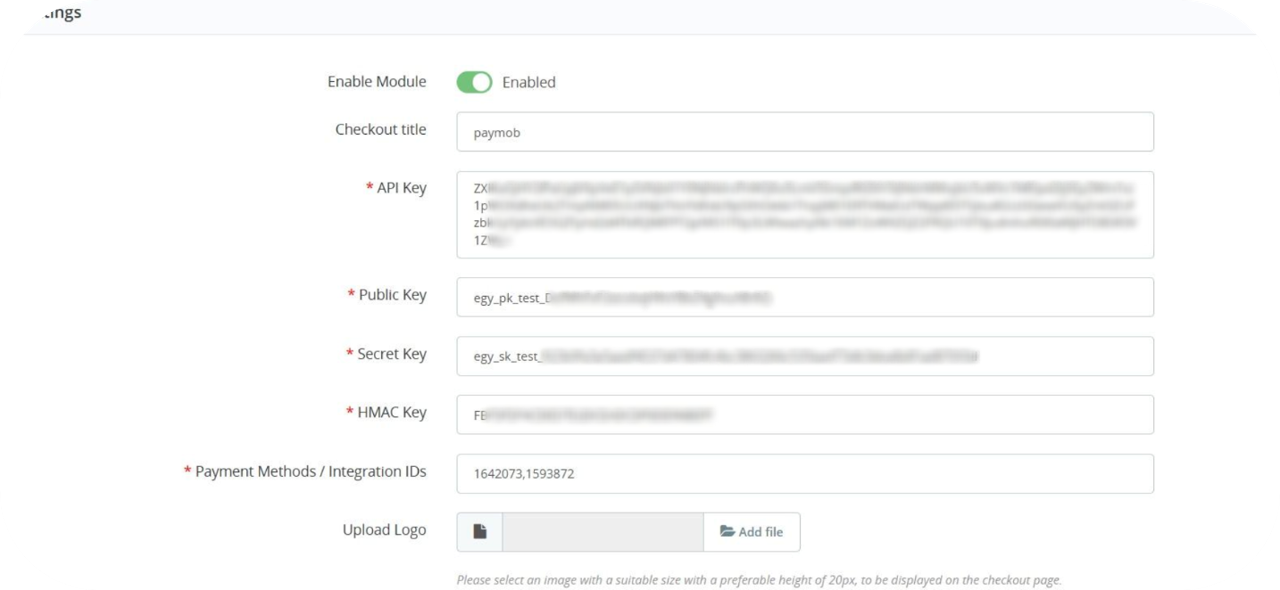
You can name your payment method according to the one you need to display in the checkout page.
4
Add all the credentials needed by pasting each key in its place.
5
Enter the integration IDs separated by a comma (,).
6
Copy the integration callback URL that exists in the Paymob PrestaShop setting page, then paste it into each payment integration in the Paymob account.
7
Save the changes
What made this section unhelpful for you?
On this page
- PrestaShop