Xero

Who is this for - Business owners and finance teams who want to accept online payments on their Xero invoices
Outcome - Explore, Connect, and Configure Paymob's Xero plugin
Last Updated Date - November 5, 2026
Overview
What is Xero?
Xero is cloud accounting software that businesses use to create and send invoices, track payments, and manage their accounts.
How the integration works
You connect your Xero organization from the Paymob Dashboard, and Paymob generates a unique Custom URL for you. You add this URL in Xero as a Custom Payment URL. When your customer opens an invoice and clicks "Pay with Paymob," they're redirected to Paymob's Hosted Checkout to complete the payment.
This integration is available for merchants in the UAE only.
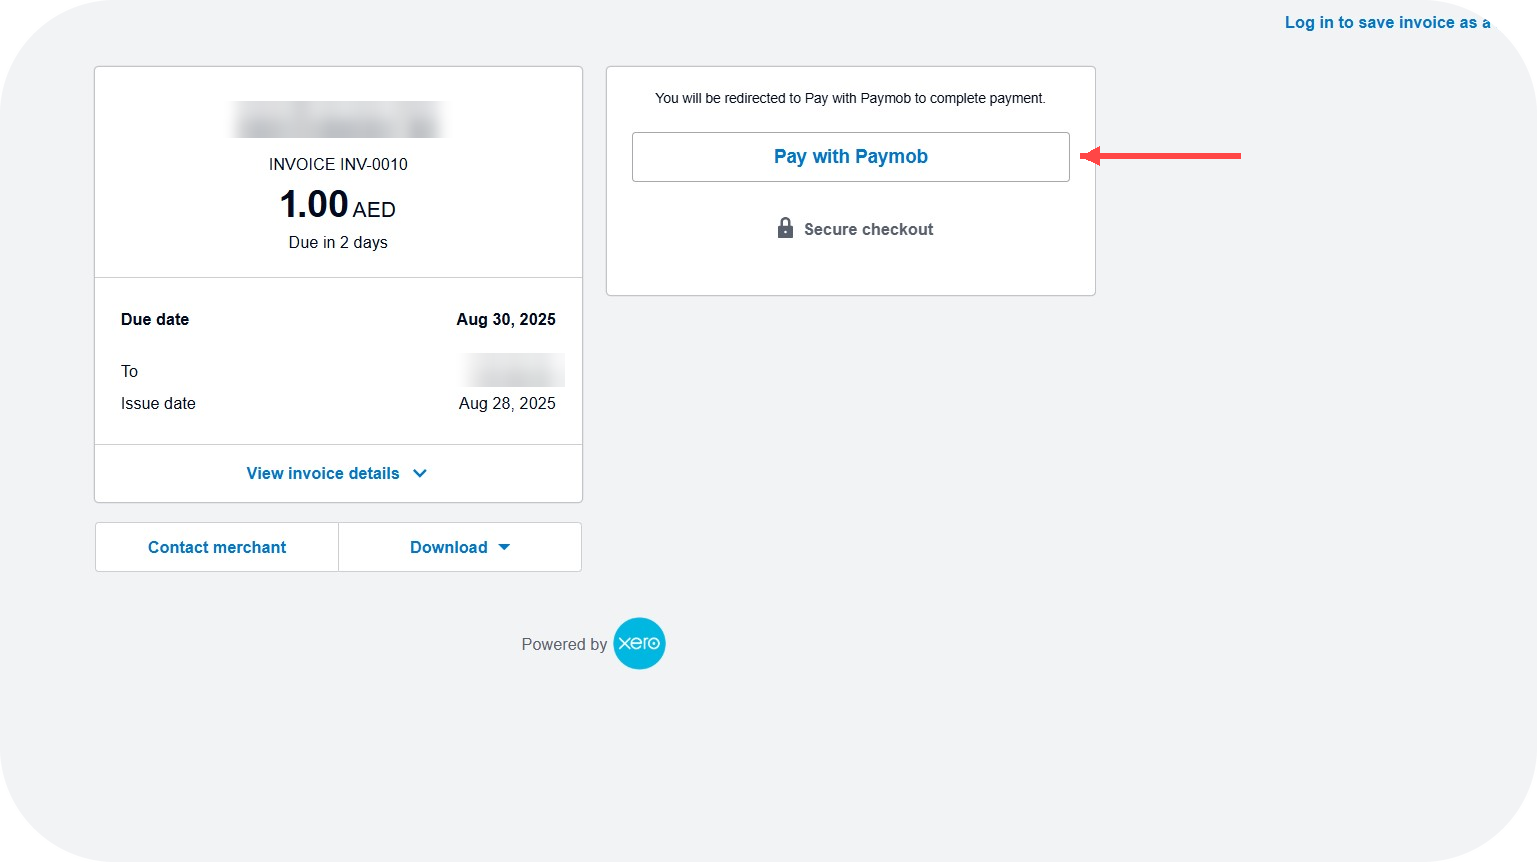
Installation Steps
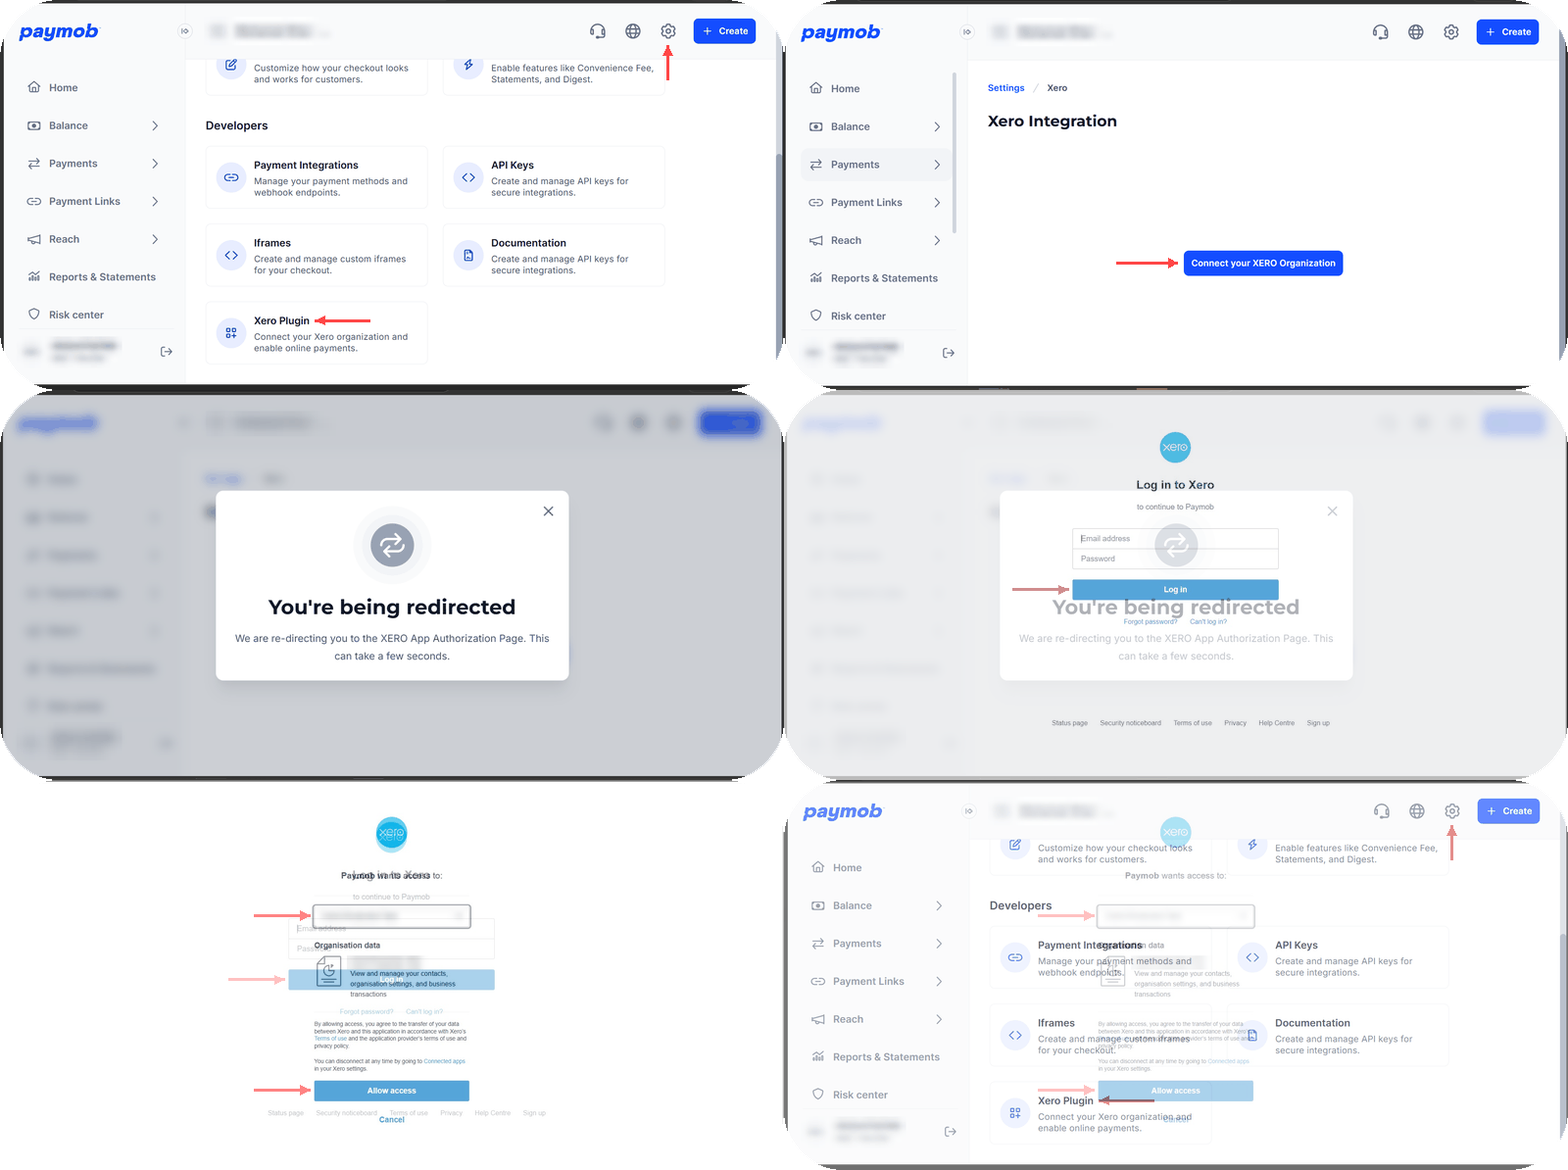
1
On your Paymob Dashboard, go to Settings ⇒ Developers ⇒ Xero Plugin.
2
Click Connect your XERO Organization. You're redirected to the Xero App Authorization page.
3
Log in to Xero, select the organization you want to connect, then click Allow access.
4
You're returned to the Xero Integration page on your Paymob Dashboard, where your organization shows as Connected. Copy the Custom URL shown on the same page. You need it in the next section.
Each Xero organization is identified by a Tenant ID. You can connect only one organization at a time. To switch, click Disconnect Organization, then connect the same organization again or a different one.
Plugin Configuration
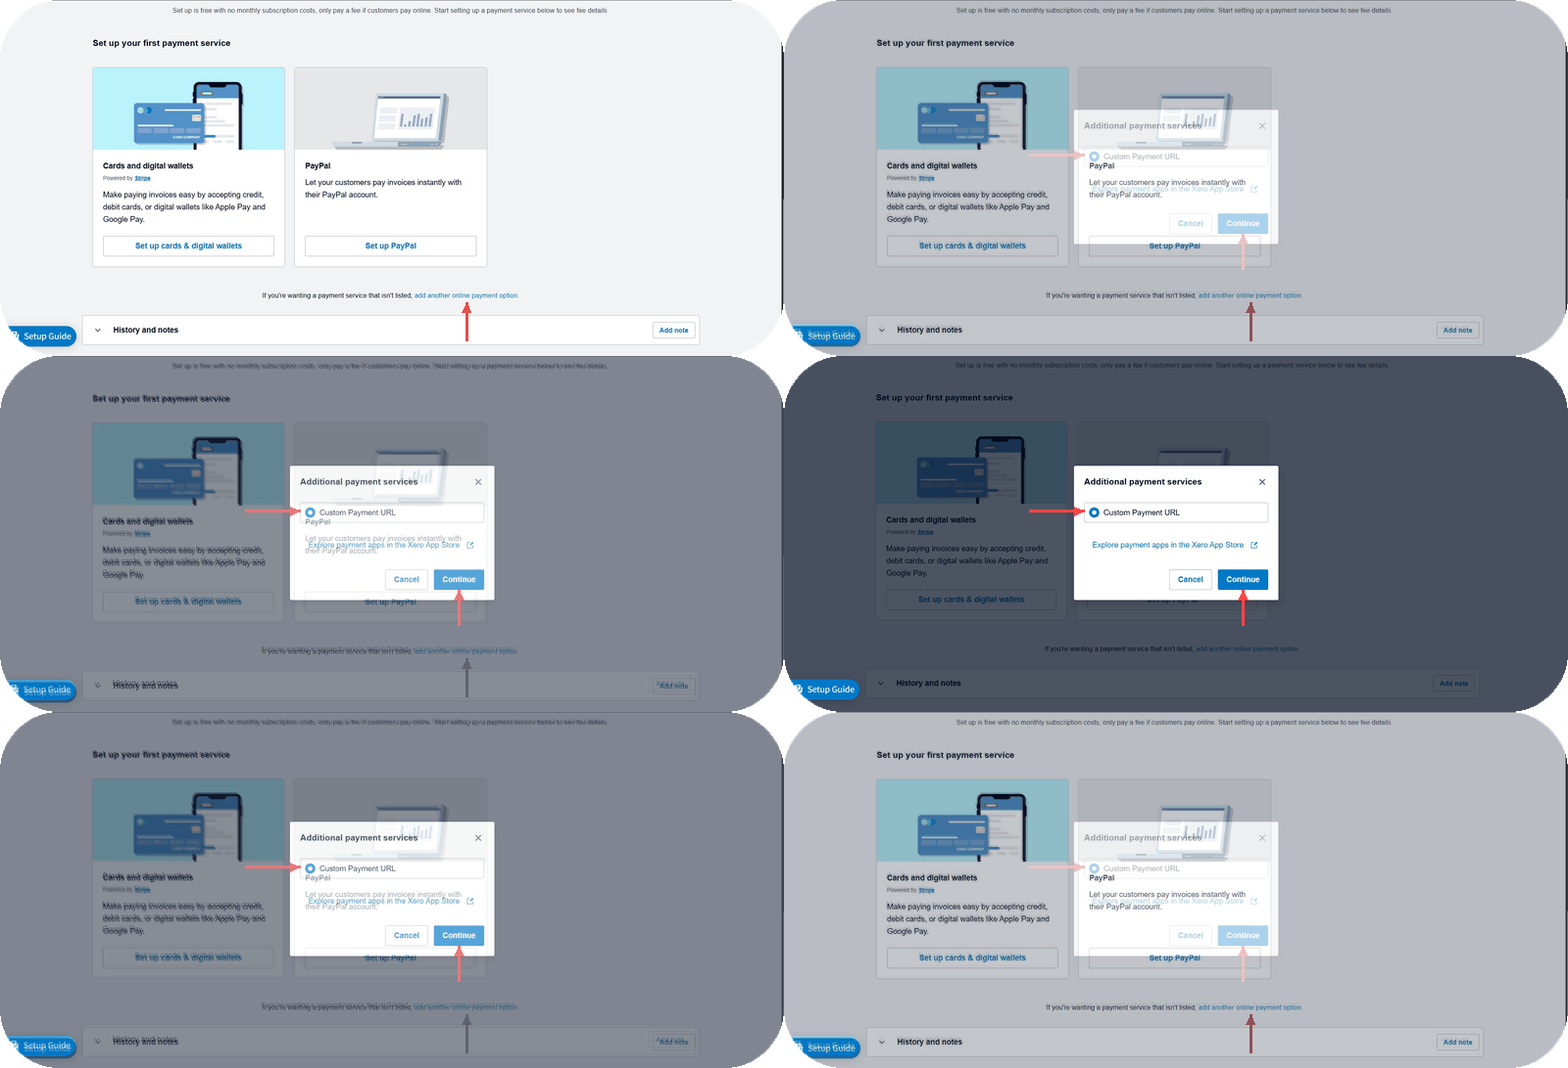
1
In your Xero account, go to Sales ⇒ Sales settings ⇒ Online payments.
2
Scroll down the page, click Add another online payment option, then select Custom Payment URL and click Continue.
3
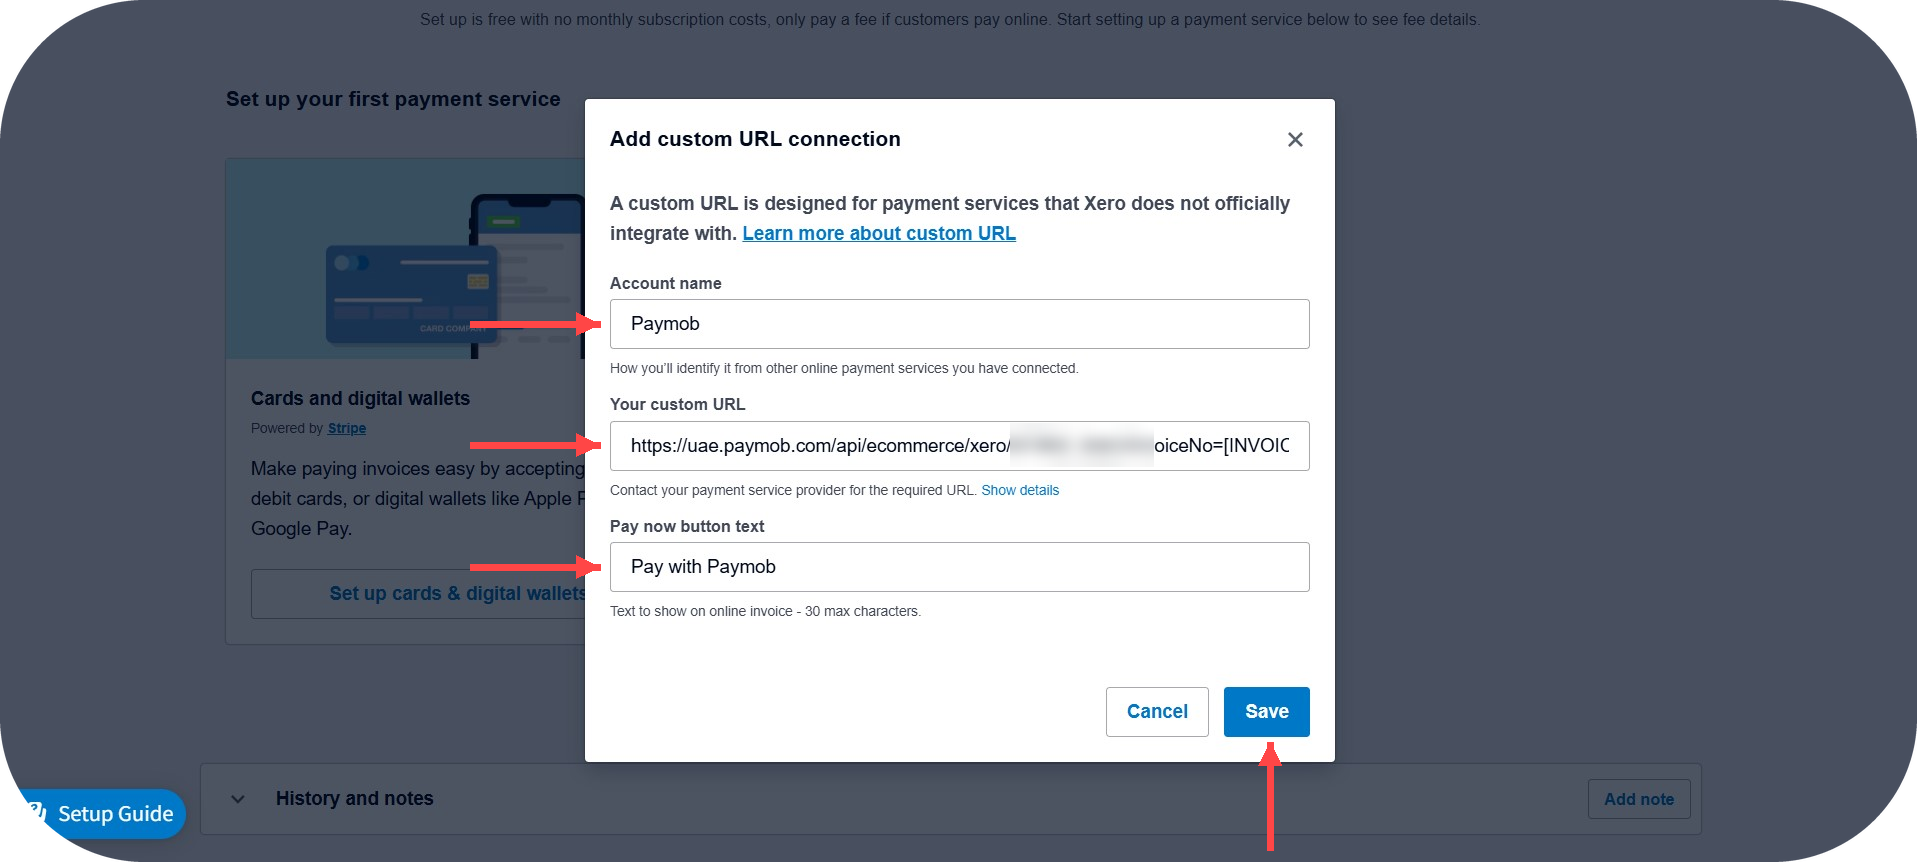
Fill in the following details:
Account name: Paymob
Your custom URL: Paste the Custom URL you copied from your Paymob Dashboard.
Pay now button text: The text your customer sees on the invoice, for example, "Pay with Paymob."
4
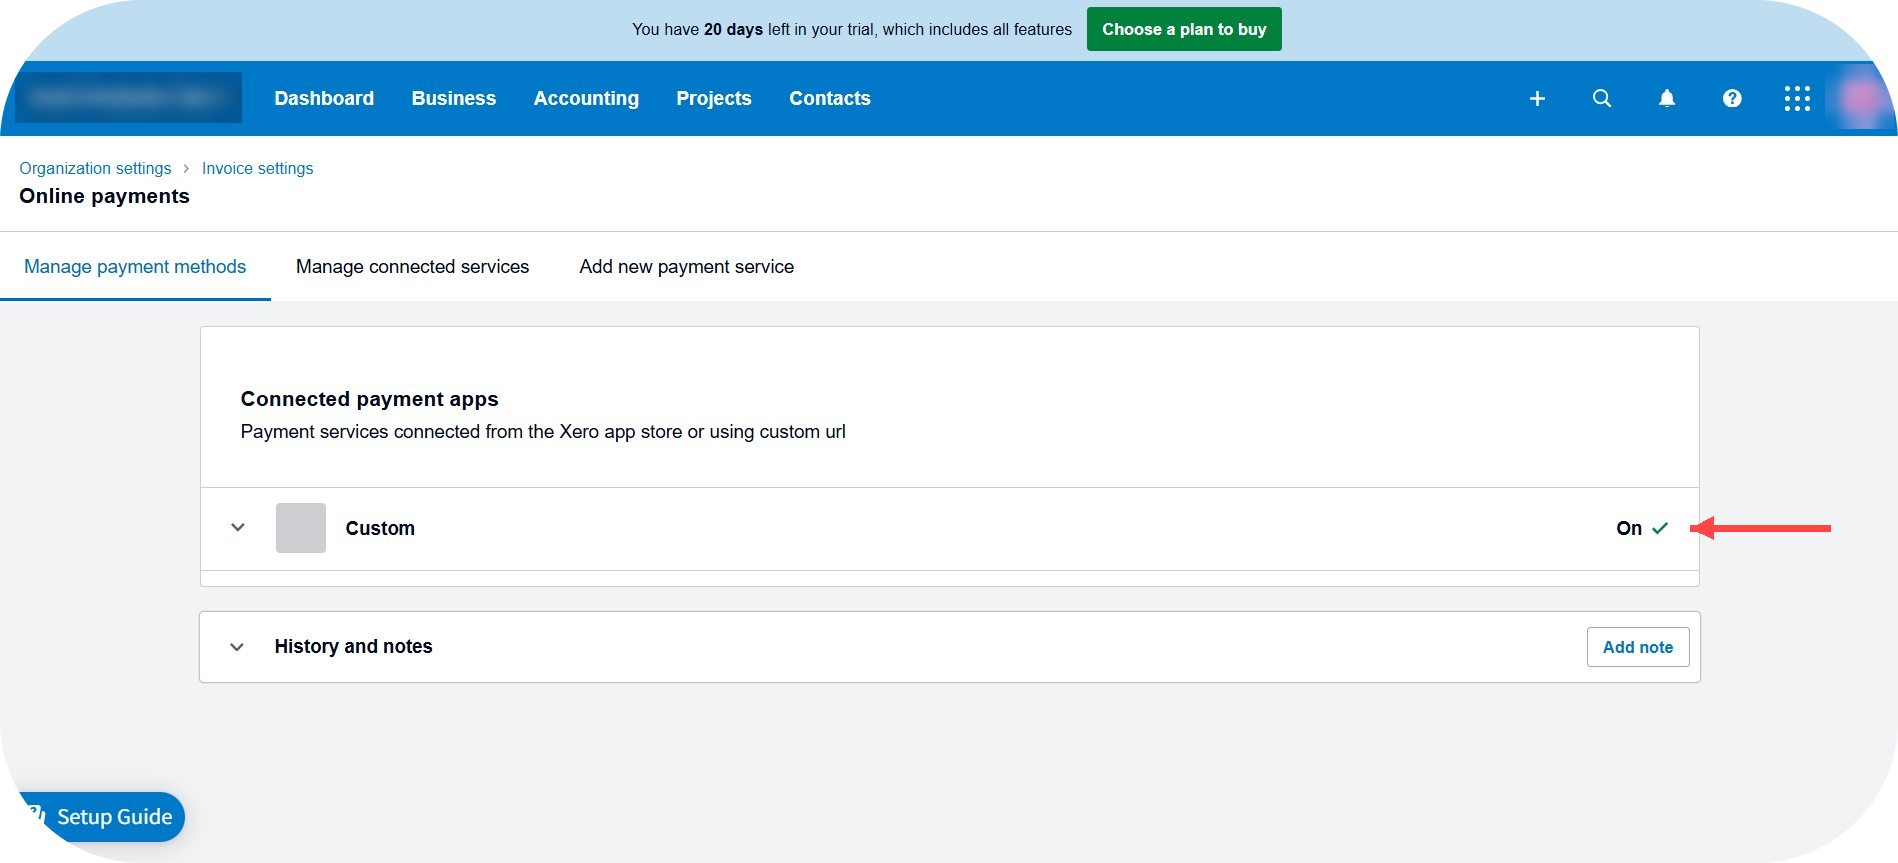
Click Save. Paymob now appears under Connected payment apps with the status On.
Using Paymob on invoices
Add Paymob to an invoice
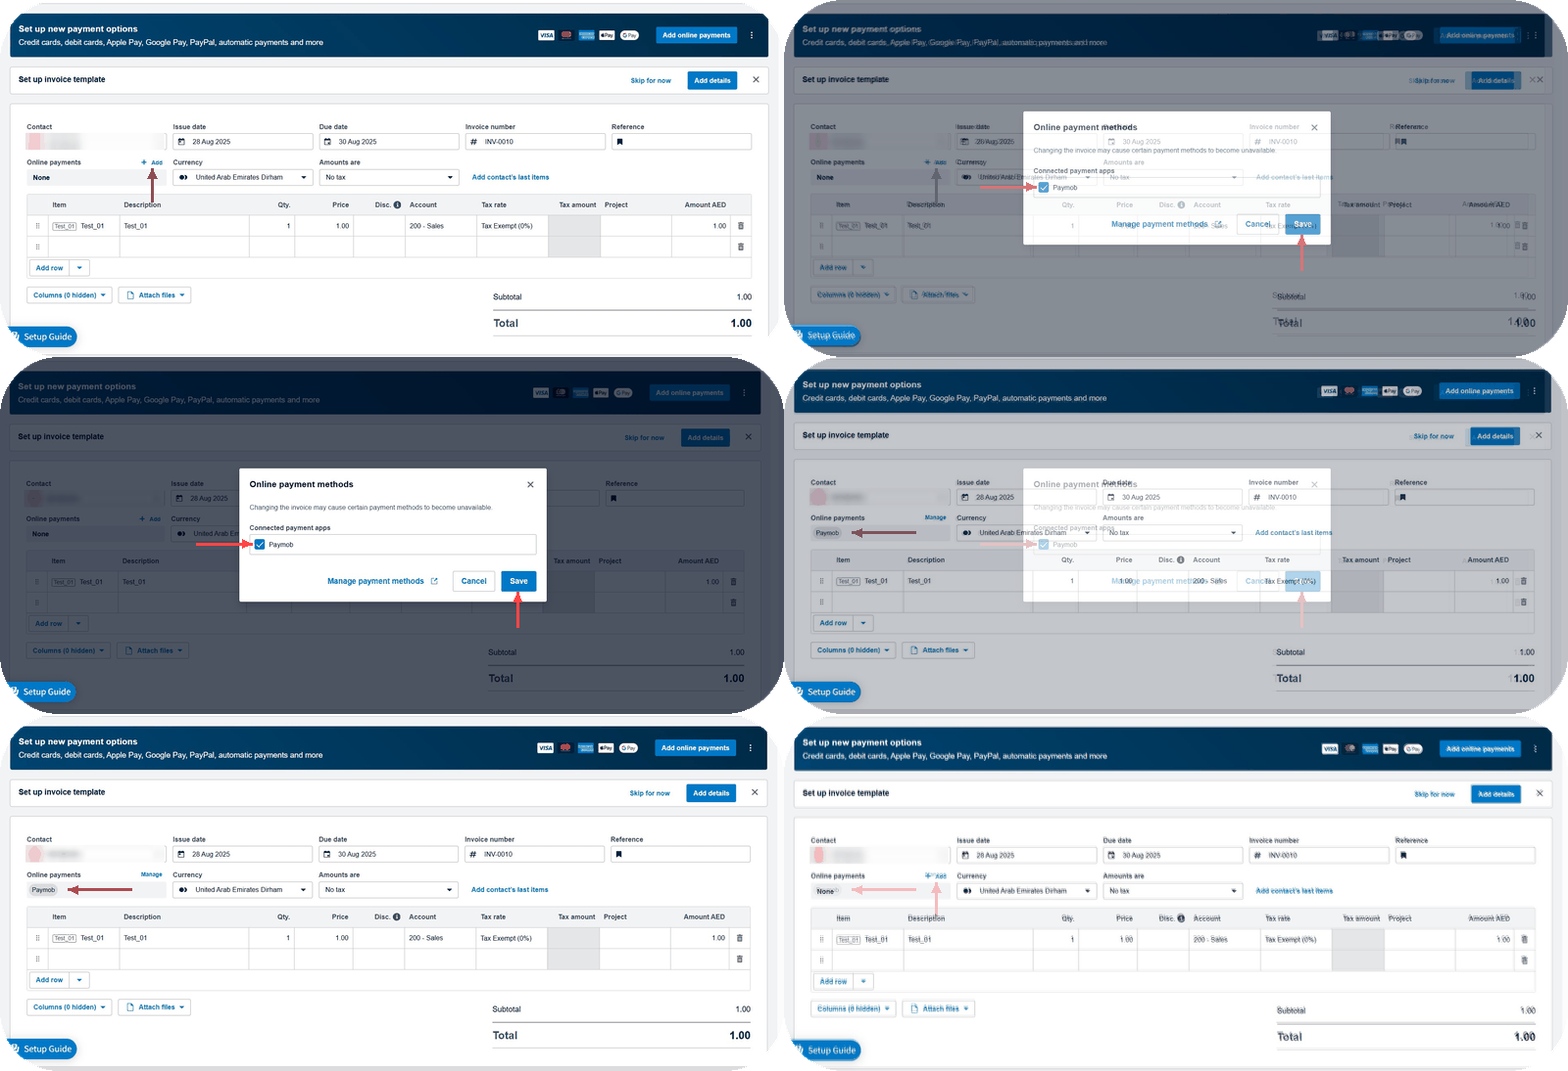
When you create an invoice, click Add next to Online payments, select the Paymob checkbox, then click Save.
Select the invoice currency that matches the currency of your Payment Integration on Paymob.
Chart of accounts
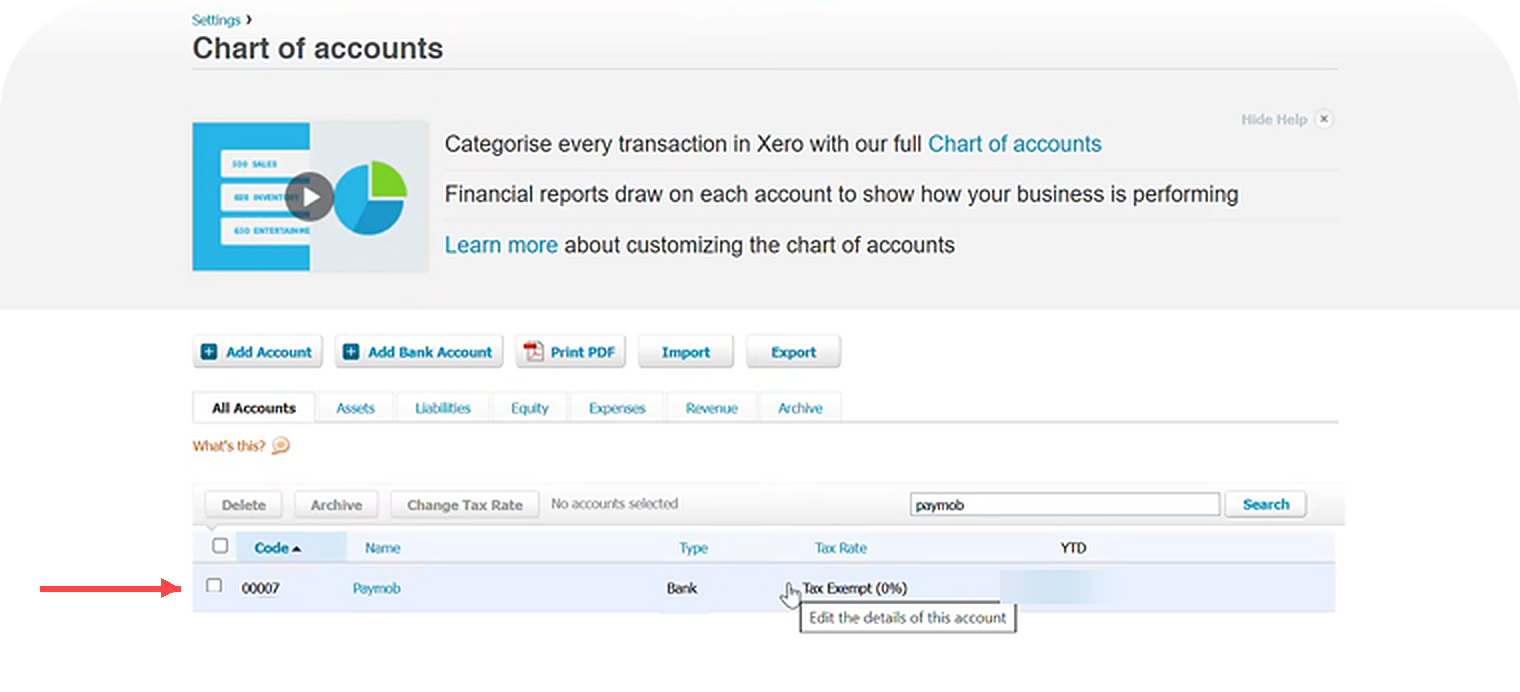
To record transactions processed through Paymob under a dedicated account, create an account in your Xero Chart of accounts with the following details:
Code | 00007 |
Name | Paymob |
Type | Bank |
Invoice payment status
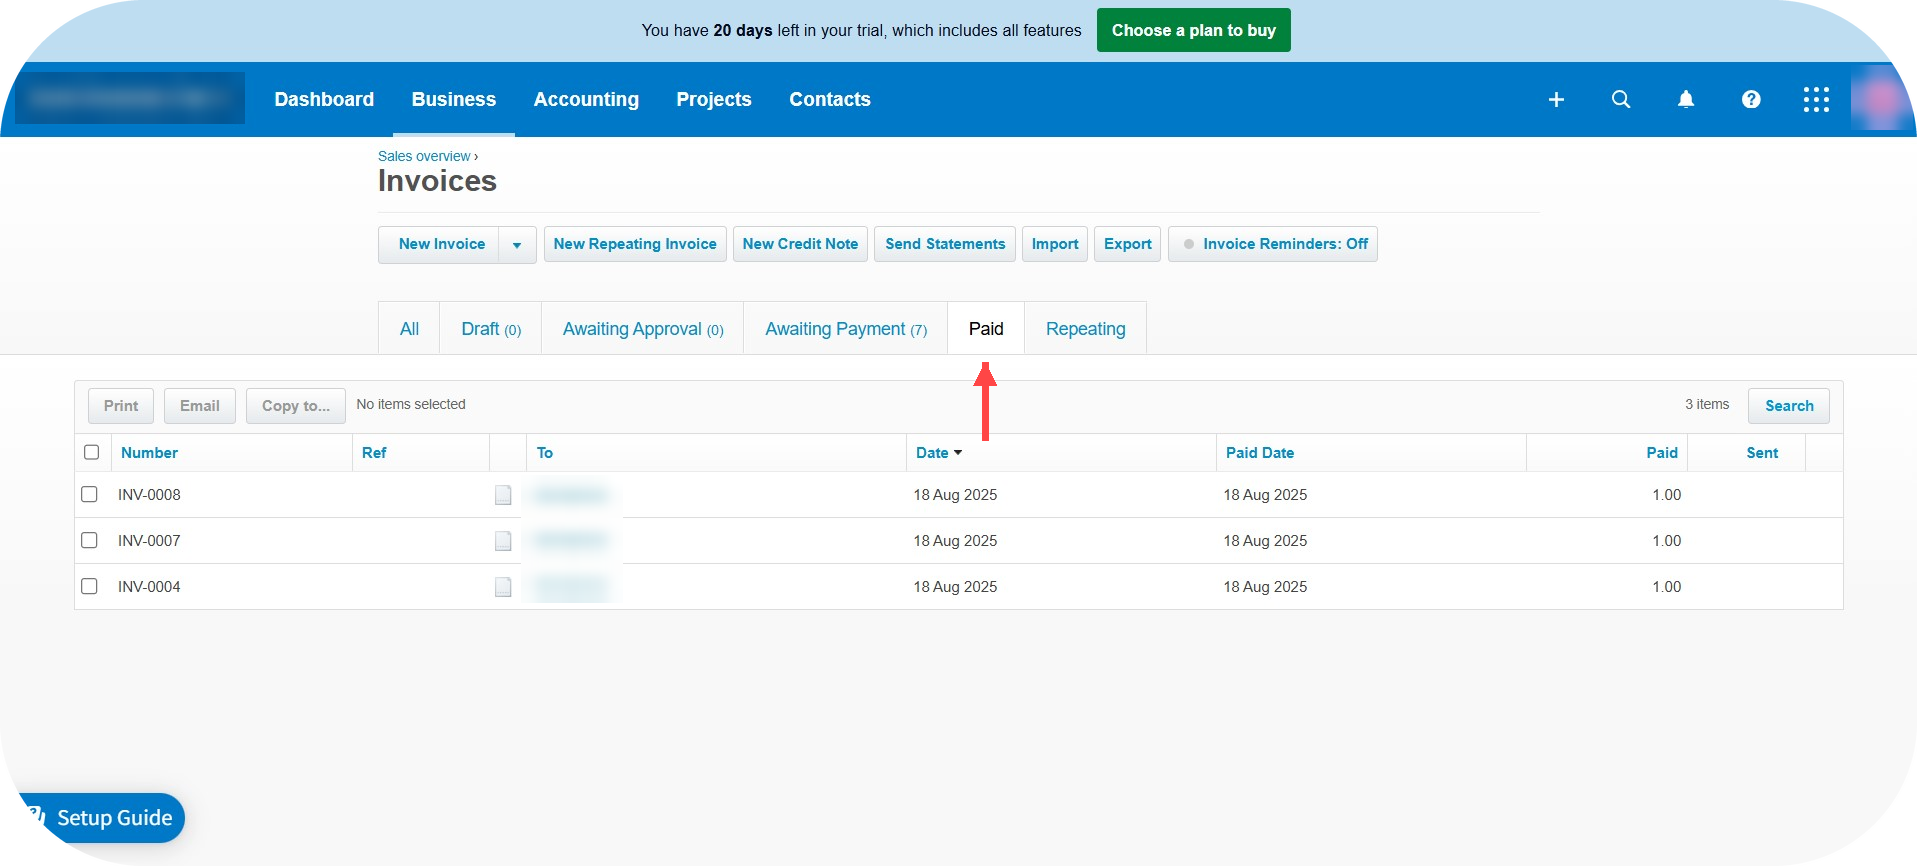
An invoice moves to the Paid tab only after a successful transaction. If the payment fails, it stays in the Awaiting Payment tab.


On this page
- Xero